
Spin Mop Handle Parts: Names, Functions, Repairs, and Replacement Guide

Quick Answer
The main spin mop handle parts are the upper handle, middle pole, lower pole, locking mechanism, grip, and mop-head connector. Some models also use a foot pedal or a pump-action handle to operate the spinning wringer. Before buying replacement parts, identify your mop’s brand, model, connector type, and damaged component, then check the manufacturer’s parts guide or official mop parts resources when applicable.
Common handle problems and quick fixes
- Loose handle: Tighten threaded pole sections or reseat the locking collar without forcing the joints.
- Handle will not lock: Inspect the twist lock, plastic collar, and internal locking parts for cracks or wear.
- Mop head falls off: Examine the connector, retaining clip, screw, or snap-fit joint.
- Handle will not spin: Check the model’s operating instructions and distinguish a handle fault from a worn mop-head joint or wringer problem.
- Bent or cracked pole: Replace the affected section or complete handle assembly if the manufacturer supports it.
Before ordering a replacement
- Compare the pole diameter, total length, thread direction, connector shape, and locking design with your original part.
- Do not assume that every 360-degree spin mop uses interchangeable handle sections.
A spin mop should feel secure in your hands, turn smoothly, and stay connected to its mop head during cleaning. When one small handle component fails, the whole cleaning routine can become frustrating.
In this guide, I’ll explain the main spin mop handle parts, what each component does, how to identify common faults, and when to repair or replace a damaged section. I’ll also cover compatibility, assembly, and safe cleaning practices for different floor types.
In This Guide
- What are the main spin mop handle parts?
- What does each handle component do?
- How do you troubleshoot common handle problems?
- Which spin mop handle parts can you replace?
- How do you choose compatible replacement parts?
- Should you repair or replace the handle?
- How do you assemble and maintain a spin mop handle?
- How do handle problems affect floor cleaning?
- Frequently asked questions
What are the main spin mop handle parts?

A spin mop handle is the pole assembly that connects your hands to the mop head and, on some designs, helps operate the wringing mechanism. Its exact construction depends on the mop brand and whether the bucket uses a foot pedal, a pump-action handle, or a separate spinner.
Most manual spin mops use several connected components rather than one solid pole.
- Upper handle: The section you hold while steering the mop.
- Middle pole: An extension that connects the upper and lower sections.
- Lower pole: The section nearest the mop head or connector.
- Locking collar or twist lock: A mechanism that secures or releases an adjustable handle.
- Grip: A plastic, rubber, or foam-covered area that improves handling.
- Mop-head connector: The fitting that attaches the pole to the rotating mop plate.
- Fasteners: Screws, bolts, nuts, clips, or threaded joints used on particular designs.
Are all spin mop handles built the same way?
No. Some handles have two or three screw-together sections, while others use a telescoping pole, snap-fit connections, or a specialized locking mechanism.
Traditional bucket spin mops also differ from powered hard-floor cleaners. A manual spin mop may use downward pressure on the handle to activate its internal spinning action, whereas a foot-pedal model operates the wringer separately.
For this reason, identify your exact model before ordering a part. A component that fits one rotary mop may not fit another, even if both use microfiber heads and similar-looking buckets.
Which parts belong to the handle, and which belong to the bucket?
The handle assembly includes the pole sections, grip, locks, and head connector. The bucket assembly usually includes the wringer basket, pedal or pump mechanism, bucket handle, and drainage components.
This distinction matters when the mop stops spinning. A loose pole joint may need attention, but a damaged pedal or wringer basket requires a different replacement part.
What does each spin mop handle component do?
Each component supports a different part of the cleaning process. Understanding its function makes it easier to find the fault instead of replacing the entire mop unnecessarily.
Upper handle and grip
The upper handle provides the main contact point for steering, pushing, and pulling the mop. A comfortable grip helps you maintain control while cleaning around furniture and along room edges.
A cracked grip does not always mean the metal pole underneath has failed. However, a loose handle cap or slippery grip can make the mop harder to control, particularly when you apply pressure.
Middle and lower pole sections
The middle pole provides length, while the lower section transfers movement toward the mop head. Threaded sections must fit securely so the assembly does not wobble or separate during use.
Inspect these sections for bent metal, damaged threads, rust, and crushed ends. A bent pole can make the mop head sit at an awkward angle, increasing effort and reducing control.
Twist lock and locking collar
A twist lock secures an adjustable handle at its selected length or changes the handle between operating positions. Depending on the model, the lock may use a rotating collar, internal sleeve, or another mechanism.
If the pole keeps shortening or sliding, check whether the lock is engaged correctly. A cracked collar or stripped locking surface usually needs replacement rather than extra tightening.
Mop-head connector and retaining hardware
The connector attaches the pole to the mop plate, allowing the head to pivot or rotate while you clean. Designs may use a threaded fitting, a bolt and nut, a snap-fit joint, or a removable locking piece.
A worn connector can cause excessive movement or allow the head to detach. Check the original assembly instructions before removing it because some snap-fit designs release differently from threaded models.
Does the handle control the spin mechanism?
Sometimes. Pump-action models use movement through the handle assembly to drive a spinning mechanism, while other designs rely on a foot pedal or a separate wringer assembly.
That difference is important when troubleshooting. If the handle moves normally but the bucket basket does not spin, the fault may be inside the wringer rather than in the pole itself.
How do you troubleshoot common spin mop handle problems?
Start by identifying exactly what has stopped working. A loose joint, a failed lock, a disconnected mop head, and a jammed wringer can feel similar during cleaning, but they require different solutions.
Why does the spin mop handle keep coming loose?
A loose handle usually points to an incompletely tightened joint, worn threads, a damaged locking collar, or a missing fastener. Stop using the mop until you can secure the connection properly.
- Place the mop on a stable surface and empty the bucket if necessary.
- Check every threaded connection and tighten it according to the manufacturer’s instructions.
- Inspect plastic collars, retaining clips, and threads for cracks or stripped areas.
- Replace damaged components instead of forcing them together.
- Test the handle gently before resuming normal cleaning.
Do not use excessive force to tighten plastic connectors. Overtightening can crack a fitting that was otherwise reusable.
Why will the handle not lock in place?
A locking mechanism may fail because of dirt buildup, incorrect assembly, worn internal parts, or a cracked collar. First, determine whether the handle uses a twist lock, a push-button lock, or a fixed threaded connection.
Clean accessible dirt with a dry cloth and follow the manufacturer’s maintenance instructions. If the locking mechanism still slips or cannot hold its position, replace the specified lock or handle assembly.
Why does the mop head keep falling off?
A detached mop head often indicates a damaged connector, missing retaining hardware, or an improperly seated snap-fit joint. Check the head plate and the fitting at the bottom of the pole before using the mop again.
Some removable heads need firm downward pressure to click into place, while others require a nut or screw. Follow the correct procedure for your model rather than copying an assembly method from another mop.
Why does my spin mop handle not spin?
The answer depends on the wringer design. A pump-action handle may have a worn drive mechanism, while a pedal-operated mop can stop spinning because of a jammed basket, damaged pedal, or internal linkage problem.
- Check that the handle is assembled and positioned correctly.
- Confirm that the mop head is seated in the appropriate washing or wringing area.
- Look for visible obstructions around the basket, with the mechanism stationary.
- Inspect the pedal or handle mechanism for obvious damage.
- Consult the manual before disassembling any spring-loaded or enclosed mechanism.
Never put your fingers into a moving spinner or attempt to repair a mechanism while it is operating. If the handle or bucket makes grinding noises, stop and inspect it before further use.
What if the handle is bent, rusty, or cracked?
A bent pole may interfere with smooth steering, while rust can weaken a metal section. Cracks around a connector or locking collar can also cause sudden separation during use.
Replace structurally damaged sections rather than trying to straighten or glue them. Adhesives and improvised fasteners may not withstand repeated twisting, pressure, and moisture.
Section Takeaway: Diagnose the exact failure before buying parts. Loose joints may need correct assembly, but damaged locks, bent poles, and broken connectors generally need replacement.
Which spin mop handle parts can you replace?
Many spin mop systems offer individual replacement components, although availability depends on the manufacturer and model. Some brands sell a complete handle assembly instead of separate collars, poles, or connectors.
The best replacement is the smallest manufacturer-approved component that restores safe, reliable operation.
Common replacement options
- Complete handle assembly: Useful when several sections are damaged or the internal mechanism is not sold separately.
- Upper or middle pole: Appropriate when a detachable section is bent, cracked, or missing.
- Locking collar: Suitable when the manufacturer offers the lock separately and the pole remains undamaged.
- Mop-head connector: Useful when the pole is sound but the bottom fitting or retaining mechanism has failed.
- Grip or handle cap: A practical option for worn external components when a compatible replacement exists.
- Fasteners: Screws, nuts, or clips can sometimes be replaced individually using the correct specifications.
Can you buy a spin mop handle without the mop head?
Yes, some suppliers sell a handle or pole assembly separately from the microfiber refill. Before ordering, confirm that the replacement includes the connector you need and fits your existing mop plate.
For example, the Uline spin mop system parts listing identifies replacement components for a specific commercial system. It illustrates why model-specific listings are more useful than choosing a handle by appearance alone.
Should you replace the mop head at the same time?
Not necessarily. A worn microfiber refill does not automatically mean the handle is damaged, and a broken handle does not always require a new mop head.
Replace both only when the head is worn, the connector is incompatible, or purchasing a complete assembly makes better practical sense. Check that the replacement head attaches securely before wet cleaning.
What if the manufacturer no longer sells the part?
Look for an official parts diagram, archived instruction manual, or authorized service provider first. These resources can reveal the original part number and whether the manufacturer offers an alternative assembly.
If the exact component is unavailable, compare compatible replacement options carefully. Avoid modifying a connector or using an improvised fastener that could release during cleaning.
How do you choose compatible spin mop handle replacement parts?
Compatibility depends on the connection and operating design, not just the handle’s length or color. Two handles can look nearly identical yet use different threads, diameters, locking systems, or mop-head fittings.
Check these details before ordering
- Brand and model: Find the name and model number on the mop, bucket, packaging, or instruction manual.
- Pole diameter: Measure the outside diameter where the replacement connects.
- Section length: Compare the individual pole length and the assembled handle length.
- Connector type: Identify threaded, snap-fit, bolted, or other attachment designs.
- Locking mechanism: Check the collar shape, thread pattern, and locking action.
- Operating system: Establish whether the mop uses a pump-action handle or a separate pedal-operated wringer.
- Included hardware: Verify whether the listing includes required nuts, clips, screws, or adapters.
A small difference in diameter or thread pitch can prevent a secure fit. Measurements help, but the manufacturer’s compatibility list remains the better reference whenever available.
Spin mop handle parts comparison table
Use this table to narrow down the type of replacement you need. It describes typical designs rather than universal dimensions or interchangeable specifications.
| Part | Typical function | What to verify |
|---|---|---|
| Upper pole | Grip and steering | Length, grip, and joint type |
| Middle pole | Extends handle length | Diameter, length, and threads |
| Lower pole | Connects to the mop head | Head fitting and locking design |
| Twist lock | Secures an adjustable pole | Exact collar and pole compatibility |
| Head connector | Attaches the mop plate | Connector shape and retaining hardware |
| Complete handle | Replaces multiple damaged sections | Model fit and included components |
Are universal spin mop handles worth buying?
Universal-style handles can be convenient when a seller provides a clear compatibility list and the necessary dimensions. However, the word “universal” does not guarantee a fit across all spin mop brands.
Read the product description carefully and compare connector photographs with your original part. If the listing does not specify supported models or connector measurements, ask the seller before purchasing.
Section Takeaway: Match the replacement to the original model and connection. Do not rely on color, advertised length, or a universal label alone.
Should you repair or replace the spin mop handle?
The right choice depends on the location of the damage, the cost of the replacement, and whether the repaired assembly can remain secure. A loose threaded joint is different from a cracked pole or a failed internal drive mechanism.
When is a repair enough?
A simple repair may be appropriate when the handle is structurally sound and the problem comes from incorrect assembly or a removable component.
- Retighten loose threaded sections using the manufacturer’s instructions.
- Reseat a removable connector that has come loose without damage.
- Clean accessible dirt from a locking collar if the instructions permit it.
- Replace a missing screw or clip with the specified compatible fastener.
Always check the finished assembly for movement before using the mop. Never rely on tape, household glue, or makeshift ties to secure a load-bearing joint.
When should you replace the handle?
Replacement makes more sense when the pole bends, the metal corrodes significantly, the locking collar cracks, or the head connector repeatedly disengages. These faults can make the mop difficult to control and may cause the head to detach unexpectedly.
If several parts have failed, compare the price of a complete handle assembly with the cost of individual components. A complete assembly may offer better value when it includes all the necessary connectors and locks.
How do you decide whether a replacement mop is more practical?
Consider the condition of the entire cleaning system rather than the handle alone. A new handle may not solve problems caused by a cracked bucket, broken pedal, worn wringer basket, or unavailable replacement heads.
For an older mop with several damaged components, replacing the complete set may be the more sensible long-term option. For a relatively new model with one broken connector, a compatible replacement part is often the simpler solution.
How do you assemble and maintain a spin mop handle?
Correct assembly reduces wobbling, protects connectors, and helps the mop operate as intended. Because handle designs vary, treat the model’s instruction manual as the final authority for assembly and maintenance.
How to assemble a typical sectional spin mop handle
- Lay out the parts. Identify the upper pole, middle pole, lower pole, locking components, and mop-head connector.
- Inspect the joints. Check threads, clips, and collars for visible damage before connecting anything.
- Connect the pole sections. Screw or snap them together using the specified method, keeping the joints aligned.
- Attach the mop head. Fit the lower connector to the mop plate and secure any required fastener.
- Set the handle position. Engage the lock or adjust the handle as directed by the manufacturer.
- Test the assembly. Apply gentle pressure and check for looseness before adding water or starting the wringer.
Do not force mismatched threads or hammer a connector into place. If the parts will not fit with normal assembly pressure, check the model number and component compatibility again.
How can you keep handle parts in good condition?
Routine care helps prevent residue buildup and makes early signs of wear easier to spot. A quick inspection after cleaning is usually enough to identify many developing problems.
- Wipe the pole and grip with a suitable damp cloth, then dry them.
- Remove visible dirt from accessible joints without flooding internal mechanisms.
- Check locking collars and connectors for movement, cracks, or corrosion.
- Rinse and dry the microfiber refill according to its care instructions.
- Empty and clean the bucket, including the wringer area, as directed.
- Store the mop indoors in a dry location, away from unnecessary heat.
Should you lubricate a spin mop handle?
Only lubricate a joint or mechanism when the manufacturer recommends it. Some plastic fittings and enclosed components may not tolerate certain oils or greases, and excess lubricant can attract dirt.
Never assume that a stiff handle needs lubrication. A damaged thread, overtightened joint, or incorrectly positioned lock may be the real cause.
Section Takeaway: Assemble the handle without forcing its connections, inspect it regularly, and follow the model-specific maintenance instructions.
How do spin mop handle problems affect floor cleaning?
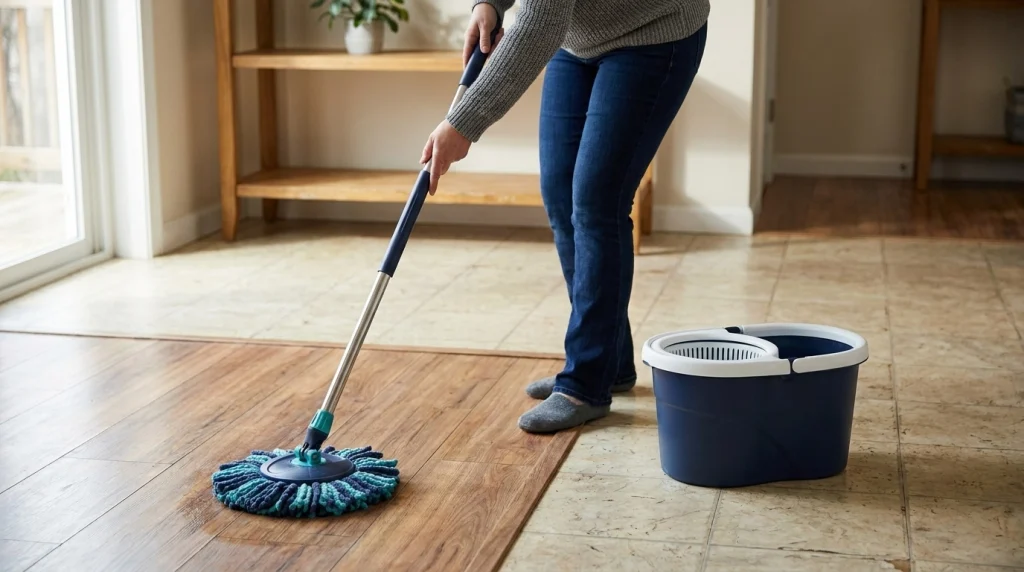
A secure handle helps you control the mop head and distribute pressure more evenly. However, a correctly working handle does not guarantee safe floor cleaning; the amount of water, cleaning solution, and floor material matter too.
Why does handle stability matter?
A loose or bent pole can make the mop head tilt, wobble, or move unpredictably. That can make it harder to reach corners and maintain consistent contact with the floor.
If the mop head detaches during use, stop cleaning and repair the connection before continuing. Loose components can also scratch delicate flooring if hard edges contact the surface.
How much water should you use on different floors?
The correct moisture level depends on the floor’s finish and manufacturer guidance. Tile and some sealed surfaces generally tolerate more moisture than unfinished wood or water-sensitive laminate joints.
| Floor type | Mopping approach | Main precaution |
|---|---|---|
| Sealed hardwood | Use a well-wrung, lightly damp mop when permitted | Avoid standing water |
| Laminate | Use minimal moisture and a suitable cleaner | Protect seams and edges |
| Vinyl or LVP | Use a compatible cleaner and controlled moisture | Avoid unapproved abrasive products |
| Ceramic or porcelain tile | Use an appropriate cleaner and clean mop head | Watch for slippery residue |
| Natural stone | Choose a stone-compatible cleaner | Avoid unapproved acidic cleaners |
Safety note: Check your flooring manufacturer’s care guide and the cleaner’s product label before use. Avoid vinegar, disinfectants, or other chemicals unless they are approved for your specific floor and finish.
How can you prevent streaks and slippery floors?
Streaks and slippery residue can result from dirty mop water, excessive cleaner, or a poorly rinsed microfiber head. A stable handle makes it easier to control your cleaning strokes, but it cannot compensate for an overloaded mop head.
- Remove loose dust and grit before wet mopping.
- Use the cleaning solution at the label’s recommended dilution.
- Rinse or replace the microfiber refill when it becomes visibly dirty.
- Wring the mop according to the floor’s moisture requirements.
- Allow the surface to dry before walking on it.
For additional guidance, consult the National Wood Flooring Association for wood-floor care information and follow your flooring manufacturer’s maintenance instructions.
Section Takeaway: Repair handle faults before cleaning, use a compatible cleaning solution, and control moisture to protect the floor and reduce slip risks.
Frequently asked questions about spin mop handle parts
1. What are the parts of a spin mop handle called?
Common spin mop handle parts include the upper handle, middle pole, lower pole, grip, twist lock or locking collar, and mop-head connector. Some models also have specialized internal components for pump-action wringing. The exact parts list depends on the brand and model.
2. Can I replace just the bottom part of my spin mop handle?
Yes, if the lower pole or connector is sold separately and the replacement matches your mop. Check the diameter, thread pattern, connector design, and locking mechanism before ordering. If the manufacturer sells only a complete handle assembly, replacing the entire assembly may be necessary.
3. Why does my spin mop handle keep sliding down?
A sliding handle may have an unlocked collar, worn locking surfaces, damaged threads, or an incorrectly assembled telescoping section. Check the locking mechanism and tighten the joint as directed. Replace a damaged lock instead of forcing it to grip or securing it with improvised materials.
4. Are spin mop handles interchangeable between brands?
Not always. Different brands and models can use different pole diameters, connector shapes, threads, and locking systems. Compare the manufacturer’s compatibility information and measurements before purchasing a replacement. Similar appearance alone does not establish a safe, secure fit.
5. How do I know whether my spin mop handle or bucket wringer is broken?
Inspect the handle joints, lock, and mop-head connector first. If the handle is secure but the spinner or pedal fails to operate, the problem may involve the bucket’s wringer mechanism. Follow the manual’s troubleshooting steps and avoid opening enclosed or spring-loaded components without suitable instructions.
6. Can I repair a cracked plastic handle connector?
A cracked connector should generally be replaced with the correct part because it must withstand repeated movement and cleaning pressure. Glue, tape, or improvised fasteners may fail unexpectedly. If the manufacturer does not offer the connector separately, consider a compatible replacement handle assembly.
7. How often should I replace spin mop handle parts?
There is no universal replacement interval for every spin mop handle. Replace a component when it becomes damaged, no longer locks securely, or fails to connect reliably. Regular inspection, correct assembly, and dry storage can help you identify wear before it interrupts cleaning.
Final takeaway: Find the right spin mop handle parts
When a spin mop handle becomes loose, stops locking, or separates from its mop head, identify the faulty component before replacing anything. Checking the model number, connector type, pole dimensions, and locking design helps prevent incompatible purchases.
For a minor assembly issue, careful tightening or correct reassembly may solve the problem. For a cracked connector, bent pole, or failed lock, choose a compatible replacement rather than relying on a temporary fix.
Finally, maintain the entire mop system, not just the handle. A secure pole, clean microfiber head, properly functioning wringer, and floor-appropriate cleaning method make routine floor care easier and safer.