
Spin Mop Pole Parts: Names, Functions, Replacement Tips, and Assembly

Quick Answer
The main spin mop pole parts are the upper handle, middle pole sections, lower pole, connecting joints, twist-lock mechanism, and mop-head connector. Some models also include a threaded collar, locking sleeve, or internal spring that helps the handle extend, lock, or activate the wringing action. Before buying a replacement, match the mop’s brand, model, connection type, and handle mechanism; official replacement-parts pages, such as the Vileda replacement parts catalog, can help you identify compatible components.
Common spin mop pole parts and their functions
- Upper handle: Provides the grip used to guide the mop across the floor.
- Pole sections: Connect to form the full-length handle and may allow length adjustment.
- Twist lock: Secures or releases a telescoping handle on models that use this design.
- Connecting sleeve: Joins pole sections and helps keep them aligned.
- Lower connector: Attaches the pole to the mop-head plate or swivel joint.
- Threaded joint or collar: Tightens the connection on compatible screw-fit designs.
Before replacing a part
- Check whether the handle is threaded, push-fit, or secured with a locking sleeve.
- Inspect for stripped threads, cracked plastic, bent metal, and loose pole sections.
- Replace only with a part confirmed compatible with your specific mop model.
A loose spin mop handle can make everyday floor cleaning frustrating, especially when the pole twists, collapses, or separates from the mop head.
In this guide, I’ll explain the main spin mop pole parts, how they fit together, what commonly goes wrong, and how to choose a replacement without wasting money on an incompatible handle.
I’ll also cover basic repairs, assembly checks, and the differences between a traditional bucket-and-spinner mop and a powered floor-cleaning system.
In This Guide
- What are the main spin mop pole parts?
- What does each pole component do?
- Why does a spin mop pole stop working properly?
- How do you choose the right replacement parts?
- How do you assemble a spin mop pole?
- Should you repair or replace the pole?
- How do you maintain spin mop pole parts?
- What are the differences between pole designs?
- Frequently asked questions
What Are the Main Spin Mop Pole Parts?

A spin mop pole is the handle assembly that connects your hands to the mop head and transfers your movement to the cleaning head. Depending on the design, it may contain several threaded sections, a telescoping lock, or a mechanism that helps spin the mop for wringing.
Not every spin mop uses the same construction. Some handles screw together, while others use push-fit joints, locking sleeves, or model-specific mechanisms.
1. Upper handle or grip
The upper handle is the part you hold while pushing, pulling, and steering the mop. It may be a simple metal tube, a shaped plastic grip, or a molded handle with a locking button.
If the grip cracks or becomes uncomfortable, check whether the manufacturer sells it separately before replacing the complete pole.
2. Middle pole sections
Many spin mops use two or more sections that connect to form a longer handle. These sections may have male and female threaded ends, internal connectors, or push-fit joints.
A damaged middle section can make the pole wobble or separate during cleaning. Replacing that section may be possible when the manufacturer offers compatible individual parts.
3. Lower pole section
The lower pole connects the upper handle assembly to the mop-head joint. It often experiences repeated bending forces when you push the mop under furniture or guide it around corners.
Inspect this section for bends, loose threads, and cracks near the bottom connection. Even a small amount of movement can make the mop head difficult to control.
4. Locking mechanism and connector
A twist lock, locking sleeve, threaded collar, or push-button connector keeps the handle assembled or controls its length. The exact mechanism depends on the mop design.
These parts deserve attention when the pole repeatedly slips, rotates unexpectedly, or refuses to stay extended.
What Does Each Spin Mop Pole Component Do?
Each pole component has a specific job, from providing a comfortable grip to maintaining a secure connection with the mop head. Understanding those jobs helps you identify which part needs attention instead of replacing the entire cleaning tool.
| Part name | Main function | Common warning sign |
|---|---|---|
| Upper grip | Provides a comfortable holding point. | Cracking or a loose grip. |
| Middle pole | Adds length and connects the handle sections. | Wobbling or separation. |
| Lower pole | Transfers movement to the mop head. | Bending or a damaged end. |
| Threaded joint | Joins compatible sections through screw threads. | Cross-threading or slipping. |
| Twist lock or sleeve | Secures or releases an adjustable pole. | The handle slides down. |
| Mop-head connector | Connects the pole to the head or swivel plate. | A loose head or cracked fitting. |
| Internal spring or drive mechanism | Supports a model-specific locking or spinning function. | The mechanism no longer engages. |
How the parts work together
During normal mopping, the handle directs the head across the floor while the lower connector allows the head to pivot. On some manual spin mops, a twist or pumping action also drives the wringing mechanism.
That means a spinning problem does not automatically indicate a broken pole. The issue may involve the handle lock, mop-head joint, wringer basket, or a mechanism specific to the model.
Why Does a Spin Mop Pole Stop Working Properly?
A spin mop pole usually develops problems through loose connections, worn locking parts, damaged threads, or physical impact. The symptom often reveals which component deserves the first inspection.
Why does the pole keep coming apart?
Loose joints are often caused by incompletely connected sections, worn threads, or a damaged connector. Stop using the pole if the connection repeatedly separates under ordinary pressure.
- Threaded sections: Check whether the sections screw together smoothly and fully.
- Push-fit sections: Look for a missing clip, broken tab, or damaged socket.
- Locking sleeves: Confirm that the sleeve reaches its locked position.
Why does the handle keep sliding down?
A telescoping pole may slip because its locking collar has worn out, become contaminated, or failed to engage. Clean accessible surfaces and follow the manufacturer’s instructions for resetting the lock.
Do not compensate by forcing the collar with pliers. Excessive pressure can crack plastic fittings or damage the locking surface.
Why won’t the spin mop handle rotate or wring?
Some manual spin mop handles use a twist-lock or pumping action, but other models rely on a separate bucket pedal. Identify your mechanism before attempting a repair.
- Check whether the handle is in the correct locked or unlocked position.
- Inspect the lower connector for looseness or visible damage.
- Check the bucket’s spinner or pedal separately if the pole moves normally but wringing fails.
Why does the mop head wobble?
A wobbling head may indicate a loose threaded connection, worn swivel joint, or cracked mop-head plate. Remove the mop head according to the manual and inspect the connection before tightening anything.
Forcing a damaged connector can turn a small repair into a complete handle replacement. A broken load-bearing joint should be replaced rather than improvised with tape or glue.
How Do You Choose the Right Spin Mop Pole Replacement Parts?
The safest way to choose a replacement is to identify the mop’s exact brand and model, then verify the part number and connection design. A pole that looks similar may still have incompatible threads, different locking geometry, or the wrong length.
Step 1: Identify your mop model
Look for a model number on the bucket, product label, instruction manual, packaging, or original purchase record. Search the manufacturer’s parts catalog using that number whenever possible.
For example, BISSELL’s Handle Assembly 1641101 listing identifies particular SpinWave models it fits, illustrating why model compatibility matters more than appearance alone.
Step 2: Match the connection type
Compare the old and replacement parts carefully. Check the joint design, thread direction, connector diameter, locking arrangement, and the way the pole attaches to the mop head.
- Screw-fit: The sections join through matching threads.
- Push-fit: One section slides into another and may click into place.
- Twist-lock: A collar or sleeve secures the adjustable section.
- Model-specific drive: A mechanism may connect to the mop’s spinning or powered assembly.
Step 3: Compare dimensions and included components
Check the replacement’s overall length, individual section lengths, connector diameter, and supplied hardware. Confirm whether the listing includes the full handle or only one tube, collar, or connector.
Never assume that two poles with similar advertised lengths will fit the same mop head. The end fittings often determine compatibility.
Step 4: Confirm the supplier’s compatibility information
Start with the original manufacturer’s parts catalog or customer support. The Vileda Spin & Clean replacement handle listing, for instance, identifies a handle intended for that specific mop range.
If a compatible replacement is unavailable, ask the seller to confirm the exact model fit in writing before purchasing. Avoid relying solely on generic descriptions such as “universal spin mop pole.”
How Do You Assemble a Spin Mop Pole?
Most sectional spin mop handles assemble by joining the pole sections and attaching the completed handle to the mop-head connector. The exact sequence differs by model, so use these general steps alongside the manufacturer’s instructions.
Basic assembly steps
- Lay out the components. Separate the upper grip, middle sections, lower pole, connector, and any supplied collars or locks.
- Inspect the ends. Remove packaging and check for damaged threads, debris, or bent fittings.
- Join the pole sections. Screw, slide, or click them together according to the specified design.
- Secure the joints. Tighten threaded parts by hand unless the instructions specify another method.
- Attach the lower connector. Fit the handle to the mop-head plate or swivel joint using the correct procedure.
- Check the locking mechanism. Set any adjustable handle to its intended operating position.
- Test gently. Hold the mop head steady and check for looseness before cleaning.
How tight should the pole connections be?
Connections should be secure without being overtightened. Excessive force can strip plastic threads, damage a collar, or make later disassembly difficult.
If a section will not connect smoothly, stop and check the alignment. Never force mismatched threads or push a connector into a socket that is too small.
What should you check after assembly?
- The pole remains straight during gentle forward and backward movement.
- The sections do not separate or slide unexpectedly.
- The mop head stays attached and pivots as intended.
- The lock engages and releases according to the manual.
Test the assembled mop over a small area first. This helps reveal a loose connection before you begin cleaning an entire room.
Should You Repair or Replace a Spin Mop Pole?
A repair makes sense when the problem involves a removable, replaceable component and the remaining handle is structurally sound. Replacing the complete pole is usually the better option when multiple joints are damaged or the handle cannot be secured reliably.
| Problem | Best next step |
|---|---|
| Loose but undamaged threaded joint | Reconnect correctly and check the fit. |
| Worn removable locking collar | Replace the collar if the manufacturer supplies it separately. |
| Bent metal pole | Replace the affected section or full assembly. |
| Cracked load-bearing connector | Replace the damaged component before reuse. |
| Unavailable proprietary mechanism | Compare manufacturer repair options with replacing the mop. |
| Several damaged sections | Compare the cost of a complete compatible handle or new mop. |
Can you repair a broken pole with tape or glue?
Tape may temporarily reduce movement in a noncritical loose cover, but it cannot reliably restore a cracked structural joint. Glue can also interfere with threaded connections, moving locks, and future repairs.
Don’t use a pole with a cracked connector or an unreliable lock. Replace the damaged component with a compatible part designed for the intended load.
When is replacing the entire mop more sensible?
Consider a new mop if the handle, head connector, and bucket mechanism all need repairs, or if replacement parts cost nearly as much as a suitable new set. A complete replacement can also make sense when the manufacturer no longer supports the model.
Compare the cost of the actual compatible parts, not just the cheapest advertised handle. Shipping, missing connectors, and incompatible fittings can make a bargain replacement less economical.
How Do You Maintain Spin Mop Pole Parts?
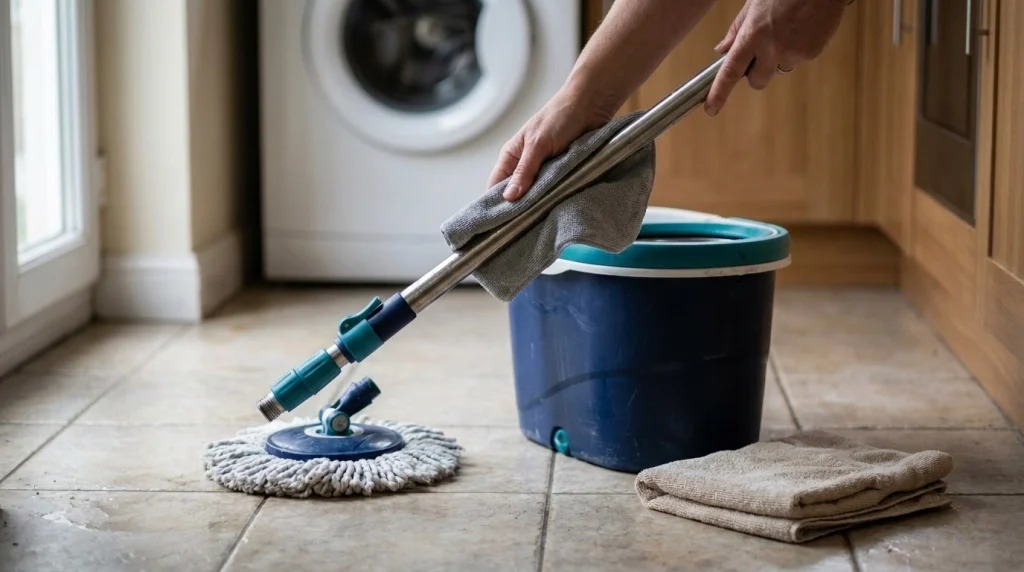
Routine maintenance helps keep pole joints secure and makes early damage easier to spot. A quick inspection after cleaning is often enough to catch loose fittings before they become a larger problem.
Clean and dry the handle
Wipe the pole with a soft cloth after use, especially around joints and locking sleeves. Remove cleaning solution or dirty water from accessible surfaces and allow the components to dry.
Avoid soaking metal connections or leaving water trapped inside hollow pole sections. Follow the manufacturer’s cleaning instructions for any plastic, coated metal, or powered components.
Inspect connections regularly
- Check threaded joints for looseness and damaged threads.
- Look for rust, bends, cracks, and sharp edges.
- Make sure collars and locks move as intended.
- Check that the mop-head connector stays firmly attached.
Use the right force when mopping
Let the mop head do the cleaning rather than leaning your full body weight onto the handle. Excessive pressure can strain the lower pole and swivel connector, particularly when the mop catches against furniture or floor transitions.
For streak-free results, wring the mop according to its design and use a cleaner appropriate for the floor. Excess water can damage some wood and laminate flooring even when the handle works perfectly.
Safety note: Check your flooring manufacturer’s care guide before choosing a cleaning solution or wet-mopping method, particularly for hardwood, engineered wood, and laminate.
What Are the Differences Between Spin Mop Pole Designs?
Spin mop poles differ mainly in how their sections connect, how the handle locks, and how the mop head or wringer receives movement. Identifying the design helps you narrow down the correct replacement.
| Pole design | How it connects | What to match |
|---|---|---|
| Threaded sectional pole | Sections screw together. | Thread diameter, direction, and length. |
| Telescoping pole | Nested tubes use a collar or lock. | Tube diameter and locking design. |
| Push-fit pole | Sections slide together or click into place. | Socket size and retaining clips. |
| Mechanism-driven handle | A model-specific mechanism controls spinning or movement. | Model number and compatible assembly. |
Are spin mop poles interchangeable?
Sometimes, but appearance alone does not prove compatibility. Two poles may have the same length and material yet use different thread sizes, connector shapes, or locking mechanisms.
Traditional manual spin mops also differ from powered rotary floor cleaners. For example, a powered system may use an electrical handle assembly rather than a simple replacement pole, so its components require model-specific identification.
When a manufacturer lists several compatible models, use that compatibility information rather than assuming all products in the same brand family share the same parts.
Frequently Asked Questions About Spin Mop Pole Parts
1. What are the parts of a spin mop handle called?
Common names include the upper grip, upper and lower pole sections, connecting sleeve, twist lock, threaded collar, and mop-head connector. Some designs also include an internal spring or drive mechanism. The exact names and number of parts vary by manufacturer and model.
2. Can I buy just the pole for my spin mop?
Yes, some manufacturers and sellers offer replacement poles or individual handle sections. Availability depends on the model. Check the official parts catalog and confirm the connection type, dimensions, and compatible model numbers before ordering.
3. Why does my spin mop handle keep coming loose?
The pole may have an incompletely tightened joint, worn threads, a damaged connector, or a locking sleeve that no longer holds securely. Inspect the connection and follow the assembly instructions. Replace damaged structural parts instead of relying on tape or glue.
4. Are spin mop replacement poles universal?
No, not all spin mop poles are interchangeable. Different models may use different thread sizes, connector diameters, lengths, and locking mechanisms. A universal-fit claim should be supported by a compatibility list or measurements that match your original handle.
5. How do I know whether the pole or mop head is broken?
Inspect the handle sections and their joints first, then examine the connector and mop-head plate. A pole that wobbles at a joint may have a loose or damaged section, while a head that moves independently at its base may have a worn swivel or cracked plate.
6. Can I use a spin mop with a damaged handle lock?
A handle that cannot lock securely may collapse, twist, or separate during cleaning. Stop using it until you repair or replace the faulty component. Check whether the lock is available separately or whether the manufacturer requires a complete handle assembly.
7. How often should I replace spin mop pole parts?
There is no universal replacement interval because wear depends on usage, storage, construction, and cleaning conditions. Inspect the pole regularly and replace parts when they crack, bend, corrode, or no longer maintain a secure connection.
Final Takeaway: Find the Correct Spin Mop Pole Parts
When a spin mop handle becomes loose or stops working properly, identify the damaged component before buying a replacement. The upper grip, pole sections, locking mechanism, connecting sleeve, and mop-head fitting each serve a different purpose.
Start with the brand and model number, compare the original connection with the replacement, and follow the manufacturer’s assembly instructions. A correctly matched part can restore a secure handle without requiring you to replace an otherwise usable mop.
For reliable floor cleaning, keep the handle connections clean and secure, avoid forcing damaged joints, and choose a suitable cleaning method for your floor type. A little maintenance helps your spin mop remain easier and safer to use.