
Spin Mop Connector Parts: Types, Uses, Repairs, and Replacement Tips

Quick Answer
Spin mop connector parts join the handle sections, mop head, or swivel mechanism so the mop stays secure while cleaning and spinning. Common parts include threaded pole connectors, mop-head adapters, swivel joints, locking collars, and extension-tube couplings. To choose the right replacement, match your mop’s brand, model, connector shape, thread size, and attachment method rather than relying on appearance alone.
Common connector problems and fixes
- Loose handle joint: Check whether the pole sections have threaded connections that need tightening by hand.
- Wobbly mop head: Inspect the head adapter, swivel joint, and retaining collar for cracks or worn threads.
- Handle won’t lock: Examine the locking collar or twist-lock mechanism for damage or incorrect assembly.
- Wrong replacement: Compare the original connector’s diameter, thread pattern, shape, and insertion depth.
- Repeated loosening: Check for stripped threads or a cracked fitting instead of continually tightening it.
Before replacing a connector
- Photograph the original joint and measure its diameter before ordering a part.
- Test the repaired connection gently before using the mop in a bucket spinner.
Spin mop connector parts can seem like small details, but a damaged joint can make an otherwise useful mop difficult to control. I’ve found that identifying exactly where the handle, head, or locking mechanism has failed is the most useful starting point.
In this guide, I’ll explain the common connector types, how to identify a compatible replacement, and which problems you can fix without replacing the entire mop. I’ll also cover cleaning considerations for hardwood, laminate, vinyl, and tile floors.
In This Guide
- What are spin mop connector parts?
- What types of spin mop connectors are there?
- How do you identify the right replacement connector?
- What causes common spin mop connector problems?
- Can you repair a spin mop connector or should you replace it?
- Which connector materials and fittings should you choose?
- How do you install and maintain a replacement connector?
- How can connector problems affect floor cleaning?
- Spin mop connector FAQs
What Are Spin Mop Connector Parts?
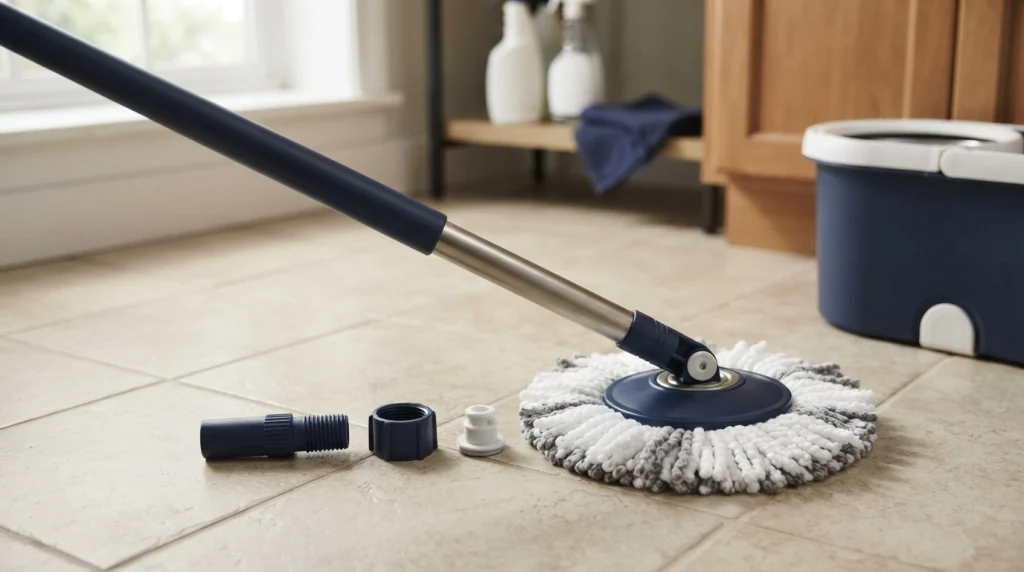
Spin mop connector parts are the fittings that join two or more components of a spin mop. They help transfer your hand movements to the mop head while keeping the handle and head securely connected.
How a spin mop connector works
A spin mop uses a rotating microfiber head to collect dirt and a bucket spinner to remove excess water. Its connectors keep the handle, head, and moving joints aligned during these tasks.
The exact arrangement depends on the design. Some models use several threaded pole sections, while others rely on a collar, push-fit adapter, or dedicated swivel assembly.
Where you’ll find the main connectors
- Between handle sections: Joins the upper and lower poles to create one long handle.
- At the mop head: Connects the bottom of the handle to the rotating head assembly.
- Inside the swivel joint: Allows the head to change angle when moving around furniture or into corners.
- At a locking mechanism: Secures an adjustable handle or controls a twist-lock feature.
A connector is not the same as the mop head plate. The plate supports the microfiber strands, while the connector attaches the head assembly to the handle or swivel joint.
Some models combine these functions in one molded fitting. Others use separate pieces, including a threaded collar and a removable adapter.
Why connector condition matters
A secure connector makes the mop easier to steer and helps prevent the head from tilting unexpectedly. A damaged fitting can also make wringing less predictable because the handle may twist or slip under pressure.
For that reason, inspect the joint before assuming the microfiber refill or bucket is the source of a problem.
What Types of Spin Mop Connectors Are There?
Spin mop connectors come in several designs, and each serves a slightly different purpose. The most important distinction is whether the fitting joins the pole sections, attaches the head, or controls movement.
Common connector types
- Threaded pole connector: Joins two handle sections using matching male and female threads.
- Mop-head adapter: Connects the bottom pole to the head assembly, often through a screw fitting or dedicated socket.
- Swivel connector: Lets the mop head pivot so you can reach under tables and around chair legs.
- Locking collar: Holds a joint or handle section in position when tightened or turned.
- Push-fit connector: Uses an insertion socket, clip, or retaining feature instead of a conventional threaded joint.
- Extension-tube coupling: Connects extra pole sections on multi-piece or adjustable handles.
Connector comparison table
| Connector type | Main purpose | What to inspect |
|---|---|---|
| Threaded pole joint | Joins handle sections | Thread direction, diameter, pitch, and damage |
| Head adapter | Attaches handle to head | Socket shape, insertion depth, and mounting method |
| Swivel joint | Allows head movement | Cracks, looseness, and restricted movement |
| Locking collar | Secures a movable joint | Worn threads, missing pieces, and fit |
| Push-fit socket | Joins components by insertion | Retention clips, socket wear, and alignment |
These categories describe common designs, not a universal parts standard. A connector that fits one brand or model may not fit another, even when the pieces look almost identical.
How to recognize your connector
Start by locating the joint that moves, separates, or feels loose. Compare it with the diagrams in your mop’s manual, paying attention to the number of pieces and how each piece attaches.
Some manuals identify the relevant component as a pole connector, head attachment, threaded collar, or swivel joint. Use the manufacturer’s wording when searching for replacement parts.
How Do You Identify the Right Replacement Connector?
The safest way to identify a replacement is to match the exact mop model and connection design. Measurements help narrow your choices, but they cannot prove compatibility by themselves.
Step 1: Find the brand and model
Look for a model number on the handle, bucket, packaging, instruction booklet, or manufacturer’s product page. If the model is unknown, photograph the complete mop and take clear close-ups of the damaged fitting.
Start with the original manufacturer’s parts catalog or customer-support service. For example, Vileda’s Spin & Clean replacement handle information illustrates why model-specific compatibility matters.
Step 2: Measure the connector
Use a ruler or caliper to record the dimensions of the original fitting. Measure the mating surfaces rather than the outside of a decorative cap.
- Outer diameter: Measure across the widest outside edge of the connector or threaded section.
- Inner diameter: Measure the opening of a socket that receives another part.
- Insertion depth: Measure how far the original pole or fitting enters the socket.
- Thread details: Record the thread diameter, spacing, direction, and shape where possible.
- Overall shape: Note flat sides, grooves, tabs, clips, and molded stops.
For threaded parts, diameter alone isn’t enough. Two connectors may have similar widths but different thread pitches, so they can bind or wobble when assembled.
Step 3: Identify the attachment method
Determine whether the original joint screws together, slides into a socket, snaps into place, or uses a collar to secure the connection. A replacement must match that method unless the manufacturer specifies a compatible conversion part.
Don’t force a threaded fitting into a push-fit socket. It may appear to fit at first but won’t create a reliable joint.
Step 4: Confirm the complete fit
Before ordering, compare the replacement’s product description with the original part and the mop model. Check whether the listing includes only the connector or also supplies a handle section, head plate, or swivel assembly.
When the manufacturer cannot confirm compatibility, avoid assuming that a listing described as “universal” will fit. Ask the seller to confirm the exact measurements and attachment type.
What should you check before buying?
- Exact brand and model compatibility.
- Matching thread or socket dimensions.
- Correct connection style and insertion depth.
- Whether the swivel or locking mechanism is included.
- Return terms if the part doesn’t fit.
These checks can prevent a common mistake: buying a replacement handle when the actual fault lies in the head connector, or buying a small adapter when the swivel assembly has failed.
What Causes Common Spin Mop Connector Problems?
Most connector problems come from loose joints, worn threads, cracked plastic, or parts that were assembled incorrectly. Identifying the symptom helps you decide whether a simple adjustment will work or a replacement is necessary.
Why does the spin mop handle keep coming loose?
A handle that repeatedly loosens may have worn threads, an incorrectly seated connector, or a locking collar that no longer holds its position. Some multi-section handles also loosen when their joints aren’t tightened properly during assembly.
- Separate the handle sections and inspect the threads for flattened or missing ridges.
- Remove visible dirt and dried cleaning residue from the joint.
- Reconnect the parts according to the manual and tighten them by hand.
- Replace the damaged fitting if the joint still slips under light pressure.
Don’t compensate for stripped threads by applying excessive force. Over-tightening can crack plastic fittings or make future removal more difficult.
Why does the mop head wobble or detach?
A wobbly head often points to a worn head adapter, loose retaining collar, damaged swivel joint, or cracked mounting point. The problem may also come from a replacement head that doesn’t match the original attachment.
Remove the microfiber head if the design allows it, then inspect the underlying plate and connector. If the head plate is secure but the handle joint moves excessively, replacing the mop-head connector may be sufficient.
Why won’t the handle lock or extend?
Twist-lock and telescopic handles depend on a mechanism that grips the pole when locked. Dirt, a damaged locking sleeve, or a worn internal component can prevent that grip from forming.
Clean accessible surfaces and follow the manufacturer’s unlocking instructions. If the handle continues sliding or collapses during use, stop using it until the locking assembly is repaired or replaced.
Why won’t the mop head rotate correctly?
A swivel head that binds may have debris lodged around the joint or a damaged pivot component. A head that moves too freely may have a broken retainer or worn connection.
Check the swivel without forcing it through its full range. If a plastic housing has split or a retaining piece has fallen out, replace the affected assembly rather than improvising a substitute.
How can you distinguish a connector fault from a bucket fault?
Remove the mop from the bucket and inspect the handle and head joints first. If they remain secure but the basket fails to rotate or the pedal doesn’t operate correctly, the fault may be in the bucket’s wringing mechanism instead.
Never reach into a moving spinner or test a damaged mop by applying extra force. Disconnect or stop any powered equipment before inspection, and keep hands clear of moving parts.
Can You Repair a Spin Mop Connector or Should You Replace It?
You can often correct a loose connector through proper reassembly or cleaning. However, a cracked fitting, stripped thread, broken clip, or failed locking mechanism generally needs a compatible replacement.
When a simple repair is enough
- Loose threaded joint: Reassemble and hand-tighten it if the threads remain intact.
- Dirt inside a socket: Remove loose debris and allow the fitting to dry before reassembly.
- Misaligned handle sections: Separate the pieces and reconnect them in the correct order.
- Incorrectly positioned collar: Refit the collar according to the manufacturer’s instructions.
These repairs address assembly problems without changing the mop’s design. They won’t restore plastic that’s cracked or threads that have worn away.
When replacement is the better option
Replace the connector when the damaged area can no longer hold the joint securely. A fitting that repeatedly slips under normal pressure isn’t reliable, even if you can temporarily tighten it.
Consider replacing the complete head assembly if the connector is molded into the head and sold only as one unit. The same principle applies to a swivel mechanism that cannot be disassembled safely.
Connector replacement versus buying a new mop
| Situation | Practical choice | Reason |
|---|---|---|
| One replaceable connector is damaged | Replace the connector | Other components may still be serviceable. |
| The head assembly includes the failed joint | Compare head assembly options | The connector may not be sold separately. |
| Several parts are broken | Compare repair and full replacement costs | Multiple repairs may offer poor value. |
| The model is discontinued and parts are unavailable | Consider a compatible new mop system | Reliable replacement parts may be difficult to source. |
Compare the actual price of the replacement part, shipping, and any required tools against the cost of a complete mop. Don’t assume a repair is cheaper until you know which assembly needs replacing.
Also check whether the manufacturer offers a warranty or replacement-part service before purchasing anything. Opening a sealed or specialized mechanism may affect warranty coverage.
Which Connector Materials and Fittings Should You Choose?
Connector material affects weight, corrosion resistance, and durability, but the correct dimensions and design matter just as much. A metal fitting isn’t automatically a better choice if it doesn’t match the mop’s original assembly.
Plastic connectors
Plastic fittings are common in household spin mops because they can be lightweight and economical. Their weakness is that thin sections, locking tabs, and threaded areas can crack or wear with repeated stress.
Inspect plastic parts for whitening around bends, hairline cracks, distorted threads, and loose mounting points. These signs can indicate damage even when the connector still holds together.
Metal connectors
Metal components may be used in handle tubes, threaded fittings, or reinforced joints. Stainless steel can offer useful corrosion resistance, while other metals may need suitable finishes to withstand repeated exposure to water.
Check the complete assembly rather than judging a replacement by its metal appearance. The fitting still needs the right thread, diameter, and shape to connect securely.
Universal connectors versus model-specific parts
A universal connector is marketed to fit multiple mop designs, but the term doesn’t guarantee compatibility with every spin mop. Some products fit only a defined range of pole diameters or thread patterns.
Model-specific parts are usually the safer starting point when the original manufacturer still supplies them. Universal alternatives make more sense when the seller provides clear dimensions and confirms the required attachment style.
What compatibility details matter most?
- Thread matching: Check diameter, pitch, direction, and thread profile.
- Socket matching: Compare the inner diameter, shape, and depth.
- Joint movement: Confirm that the replacement permits the swivel or locking movement your mop needs.
- Material suitability: Choose a fitting designed for repeated household use and exposure to water.
- Replacement scope: Confirm whether the listing supplies the connector alone or the complete head assembly.
A seller’s compatibility statement is more useful than a generic claim that a part fits “most mops.” If dimensions are missing, request them before ordering.
Safety note: Don’t use household glue, improvised screws, or unsuitable metal adapters to bridge a broken load-bearing joint. A failed connection can cause sudden movement and loss of control while mopping.
How Do You Install and Maintain a Replacement Connector?
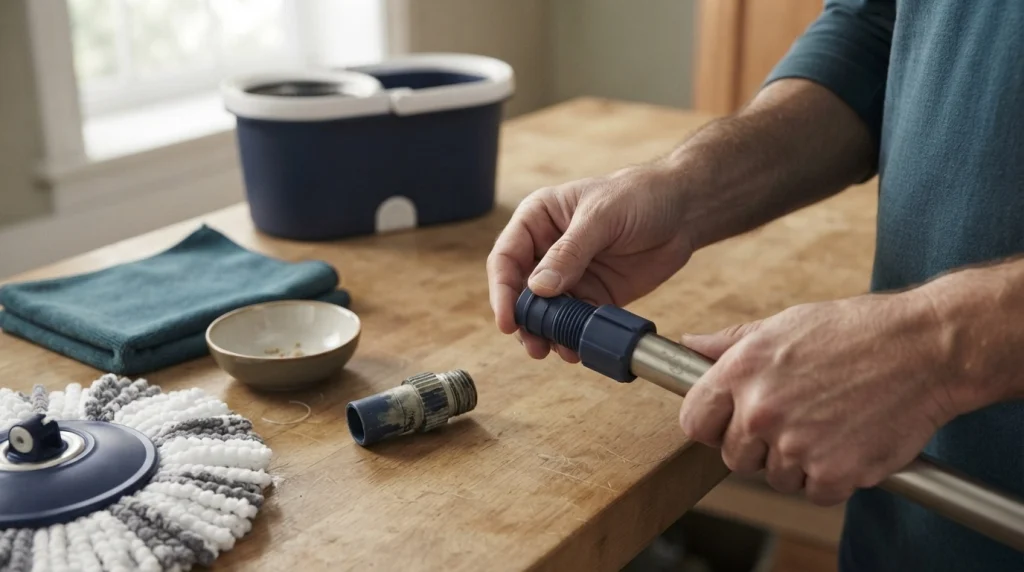
Installing a replacement connector starts with identifying the original assembly and following its intended attachment method. Clean, correctly aligned joints are easier to fit and less likely to loosen during use.
Step-by-step installation
- Prepare the mop: Empty the bucket and place the handle on a stable surface.
- Remove the damaged part: Unscrew or release the fitting according to the manual without forcing it.
- Clean the joint: Wipe away loose dirt and dried residue from the mating surfaces.
- Compare the parts: Check the replacement against the original for shape, dimensions, and attachment method.
- Fit the connector: Align the threads or socket correctly, then secure it according to the manufacturer’s instructions.
- Check the joint: Look for gaps, uneven seating, or movement that shouldn’t be present.
- Test gently: Move the handle and swivel through their normal range before returning to routine cleaning.
Many threaded household mop fittings are designed for hand assembly. Use a tool only when the manufacturer specifically requires it, and never overtighten a plastic connection.
How to maintain connectors between repairs
- Wipe the handle joints after cleaning if water or solution has collected around them.
- Remove visible debris from accessible sockets and swivel joints.
- Allow detachable parts to dry before storing the mop.
- Check the handle and head attachment when replacing a worn microfiber refill.
- Store the mop without bending or loading the connector unnecessarily.
Don’t immerse a connector or use solvents unless the product instructions allow it. Some cleaning chemicals can damage plastic or affect the finish on metal parts.
Safety note: Follow the mop manufacturer’s cleaning instructions and the cleaner’s label. Avoid mixing cleaning chemicals, and keep the assembly away from children while repairing it.
How often should you inspect the connector?
There’s no universal replacement interval for spin mop connectors. Inspect the joint whenever you notice wobbling, slipping, unusual resistance, or a change in how the head moves.
A quick visual check during routine mop-head changes can also reveal damage before the next cleaning session. Replace parts based on wear and fit, not an arbitrary calendar schedule.
How Can Connector Problems Affect Floor Cleaning?
A loose or damaged connector can make it harder to control the mop head and distribute cleaning pressure evenly. Fixing the mechanical problem helps, but you should also adjust your cleaning method to suit the floor surface.
Hardwood and engineered wood
Wood floors can be damaged by excess moisture, especially when water reaches seams or unfinished areas. A secure connector helps you control the mop, but it doesn’t make the floor waterproof.
Use a well-wrung microfiber head and a cleaner approved for your floor’s finish. The National Wood Flooring Association provides wood-floor care resources that can help guide maintenance decisions.
Laminate and vinyl flooring
Laminate can swell when moisture enters vulnerable seams, while vinyl flooring may be affected by unsuitable cleaners or excessive water entering joints. A stable mop head makes controlled cleaning easier on both surfaces.
Use only the amount of moisture permitted by the flooring manufacturer. Avoid soaking the floor while testing a newly installed connector.
Tile and natural stone
Tile generally tolerates routine damp mopping better than moisture-sensitive wood, but grout and natural stone still need appropriate care. A loose swivel can also make it harder to control pressure around grout lines and uneven surfaces.
Choose a cleaner approved for the specific stone or tile finish. For marble and other sensitive natural stones, avoid acidic cleaners unless the manufacturer’s guidance explicitly permits them.
How to prevent streaks and residue after repairs
A repaired connector won’t solve streaks caused by dirty microfiber, excess detergent, or contaminated rinse water. Check the pad and cleaning solution if the floor still looks dull after the mop is working properly.
- Wash reusable microfiber according to its care label.
- Use the recommended cleaner concentration instead of adding extra detergent.
- Rinse the mop head when it becomes visibly dirty.
- Allow the floor to dry before walking across it.
For broader cleaning and disinfection guidance, the U.S. Environmental Protection Agency explains how to choose and use registered cleaning and disinfecting products. Ordinary floor cleaning doesn’t always require a disinfectant.
Safety note: Check the flooring manufacturer’s care guide and each cleaning product’s label before use. Keep people away from wet floors until they are safe to walk on.
Spin Mop Connector Parts: Frequently Asked Questions
Are spin mop connectors universal?
No. Some replacement connectors fit multiple mop models, but others use brand-specific threads, sockets, or swivel assemblies. Check the model number and connector dimensions before buying, and ask the seller to confirm compatibility if the listing doesn’t provide enough detail.
Can I replace only the spin mop connector?
Yes, if the connector is sold separately and the surrounding parts remain undamaged. Some mop designs integrate the connector into the swivel joint or head assembly, so you may need to replace a larger component instead.
How do I know whether the connector or handle is broken?
Inspect the joint where the handle sections meet and where the handle attaches to the mop head. If the pole is intact but the fitting has cracked, stripped threads, or excessive movement, the connector may be the problem. A bent or split pole requires a different replacement.
Why does my replacement connector not fit?
The replacement may have a different thread pitch, diameter, socket depth, or attachment design. Similar-looking fittings aren’t necessarily interchangeable. Compare the original and replacement measurements, then confirm the exact model compatibility before attempting another installation.
Can I glue a cracked spin mop connector?
Replacing a cracked load-bearing connector is generally safer than gluing it. Adhesives may not withstand repeated twisting, moisture, and pressure, and a failed joint can make the mop difficult to control. Check whether the manufacturer supplies a replacement fitting or head assembly.
How much does a replacement spin mop connector cost?
Prices vary by brand, part type, material, and availability. A simple adapter may cost less than a complete swivel or handle assembly, but shipping can change the total. Compare the final cost with the price of a replacement mop before deciding.
Can I use a spin mop with a loose connector?
It’s best to stop using the mop until the connection is secure. A loose joint can worsen during mopping or wringing, and a damaged locking mechanism may let the handle slip unexpectedly. Inspect the fitting and repair or replace it before resuming normal use.
Final Takeaway: Choose the Right Spin Mop Connector
The right spin mop connector parts keep the handle, swivel joint, and mop head securely connected. When a fitting fails, identify the exact joint first, check its dimensions, and confirm compatibility with your mop model.
Start with the manufacturer’s replacement parts when available. If a simple reassembly won’t solve the problem, replace the damaged fitting rather than forcing a mismatched adapter into place.
A properly fitted connector can extend the useful life of an otherwise serviceable mop. Combine that repair with regular joint inspections, a clean microfiber head, and floor-appropriate cleaning methods for more reliable everyday cleaning.
Before you buy: Take a photo of the damaged connector, record the mop’s brand and model, and measure the original fitting. Those three steps will make it easier to find a compatible replacement without wasting money on the wrong part.