
Spin Mop Bucket Drain Parts: What They Do, How to Fix Leaks, and When to Replace Them

Quick Answer
Spin mop bucket drain parts let you empty dirty water without lifting and tipping the entire bucket. Depending on the model, the drainage system may use a drain plug, threaded cap, rubber seal, drain outlet, or release valve. If your bucket leaks, drains slowly, or refuses to empty, inspect the drain fitting and its seal before replacing the whole bucket.
Parts to check first
- Drain plug or cap: Closes the outlet and prevents water from escaping.
- Rubber gasket or O-ring: Creates a watertight seal around compatible fittings.
- Drain outlet: Provides the opening through which wastewater leaves the bucket.
- Valve or release mechanism: Opens or closes the drain on designs that use one.
- Mounting threads: Hold a threaded cap or plug securely in place.
A quick troubleshooting tip
- Empty the bucket, remove loose dirt around the outlet, check the seal, and reinstall the original fitting correctly. If the plastic is cracked or the threads are stripped, look for a compatible replacement or replace the bucket if the part isn’t sold separately.
A leaking spin mop bucket can turn a simple floor-cleaning routine into an annoying cleanup job. I’ve found that the best starting point is to identify the exact drain design instead of assuming every bucket uses the same plug or valve.
This guide explains the common spin mop bucket drain parts, how to recognize their failure signs, and how to troubleshoot leaks without damaging the plastic. It also covers replacement compatibility, cleaning safety, and the differences between spin mop drainage systems and other floor-cleaning tools.
In This Guide
- What are spin mop bucket drain parts?
- Which drain parts does a spin mop bucket use?
- Why is your spin mop bucket leaking or draining slowly?
- How do you troubleshoot a faulty drain?
- How do you choose compatible replacement parts?
- How do you clean and maintain drain parts?
- How do spin mop drains compare with other mop systems?
- When should you replace a drain part or bucket?
- Frequently asked questions
What Are Spin Mop Bucket Drain Parts?
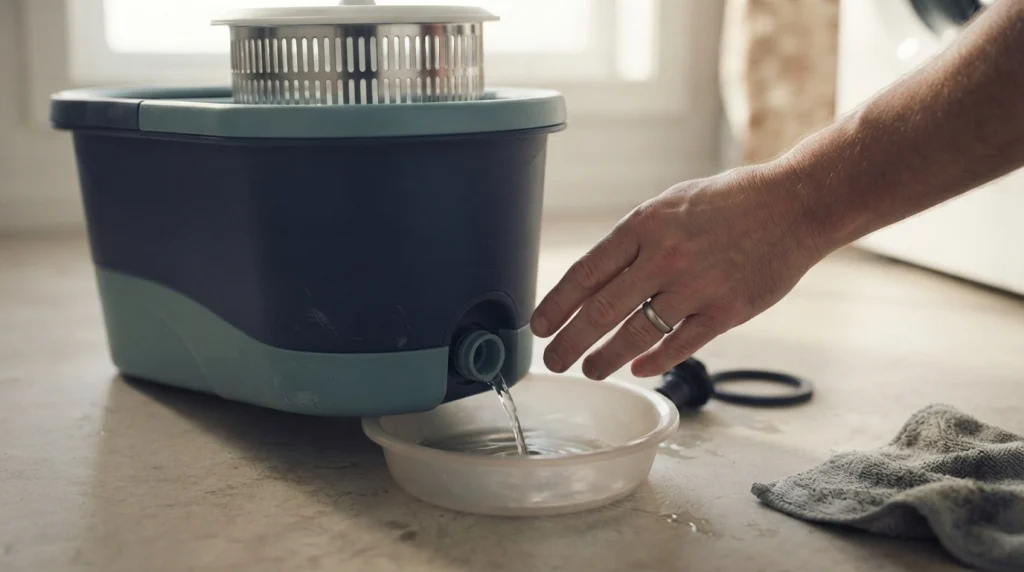
Spin mop bucket drain parts are the fittings and sealing components that control how wastewater leaves a spin mop bucket. They make emptying easier and help prevent leaks when the bucket holds cleaning water.
How the drain system works
A spin mop bucket is a cleaning container that commonly includes a spinning basket or wringer for removing excess water from a mop head. Some models also have a dedicated drain outlet near the bottom or side of the bucket.
The drain system is separate from the spinning mechanism. The wringer removes water from the mop fibers, while the drain outlet lets you empty water collected inside the bucket.
- During cleaning: The drain plug or valve remains closed so the bucket can hold water.
- When emptying: You open or remove the designated closure, allowing wastewater to flow out.
- After draining: You clean the opening and reinstall the closure to prevent leaks during the next use.
Do all spin mop buckets have a drain plug?
No. Some buckets have a dedicated drain fitting, while others must be emptied by carefully tipping the container. Drain designs vary by brand, model, bucket shape, and product generation.
Before ordering a replacement, inspect the bucket itself and consult its manual. A drain part advertised for one spin mop model may not fit another, even when both products look similar.
Which Drain Parts Does a Spin Mop Bucket Use?
The exact components depend on the bucket’s design. The most common parts to inspect are the closure, sealing surface, outlet, and any hardware that secures the fitting.
1. Drain plug or stopper
A drain plug blocks the outlet when the bucket contains water. Depending on the design, it may push into an opening, twist into place, or attach to a fitting.
A missing, loose, warped, or damaged plug can cause water to seep out even when the bucket is standing on a level surface. Replace it with the correct design rather than forcing a generic stopper into the opening.
2. Threaded drain cap
A threaded cap screws onto a matching outlet. Its threads hold the closure in place, while a separate sealing surface or gasket may prevent water from escaping.
Cross-threading can make the cap sit crooked or loosen during use. Turn it gently into position and stop if it binds instead of tightening normally.
3. Rubber gasket or O-ring
A gasket or O-ring is a flexible sealing component used in some drain assemblies. It fills small gaps between compatible surfaces to reduce water leakage.
Over time, a seal may become flattened, brittle, displaced, or damaged. However, not every drain plug contains a removable gasket, so check the parts diagram before attempting disassembly.
4. Drain outlet or housing
The outlet is the opening through which water leaves the bucket. Some designs incorporate a molded plastic housing, while others use a separate fitting attached to the container.
Cracks around the outlet, damaged mounting points, and distorted plastic can cause persistent leaks. These problems may require a complete drain assembly or a new bucket if the housing isn’t replaceable.
5. Drain valve or release mechanism
Some buckets use a valve or movable closure instead of a simple removable plug. The mechanism opens the water passage when drainage is needed and closes it afterward.
Debris can interfere with movement, while worn seals or broken levers can prevent proper closure. Never assume that a valve can be disassembled; some assemblies are designed to remain intact.
6. Retaining hardware and tethers
Depending on the model, small retaining pieces or a tether may keep a plug attached to the bucket. These components can reduce the chance of losing the closure during cleaning.
A tether does not normally provide the watertight seal itself. If water leaks around the outlet, inspect the plug, sealing surfaces, and housing rather than replacing the tether alone.
| Part | Main function | Common warning sign |
|---|---|---|
| Drain plug | Closes the outlet | Water escapes around the closure |
| Threaded cap | Secures a removable closure | Cap wobbles or won’t engage |
| Gasket or O-ring | Seals mating surfaces | Leak persists despite correct closure |
| Outlet housing | Channels water outside | Visible cracks or damaged mounting |
| Valve mechanism | Controls drainage | Sticking or incomplete closure |
Why Is Your Spin Mop Bucket Leaking or Draining Slowly?
A leaking bucket usually points to a closure problem, a damaged seal, or a crack near the drain. Slow drainage can also result from debris blocking the outlet or a valve that doesn’t open fully.
Why does water leak from the drain plug?
The plug may be loose, incorrectly seated, or incompatible with the outlet. Even a small gap can allow water to escape while the bucket stands unused.
Remove the water and inspect the contact surfaces for hair, grit, dried detergent, or visible damage. Clean the area before reinstalling the original plug according to the manufacturer’s instructions.
Why does the bucket leak even when the cap is tight?
A tight cap doesn’t guarantee a watertight connection. A damaged gasket, worn sealing surface, cross-threaded cap, or cracked outlet can allow leakage despite firm tightening.
Check whether the cap sits evenly against the outlet. Don’t keep tightening it if resistance increases suddenly, because excessive force may damage the threads or split the plastic.
Why won’t the bucket drain completely?
A partially blocked outlet can slow drainage, especially when the water contains hair, mop fibers, or settled dirt. Some bucket designs also retain a small amount of water because the outlet sits above the lowest point.
- Visible debris: Remove loose material from the accessible opening.
- Restricted flow: Check whether the plug or valve opens fully.
- Bucket position: Place the bucket on a stable, level surface and follow its intended draining procedure.
- Design limitation: Check the manual if a small amount of water remains after normal drainage.
What if the drain fitting is cracked?
A crack around the outlet is more serious than a dirty seal. It may widen when the bucket contains water or when someone applies pressure to the fitting.
Stop using the bucket until you’ve assessed the damage. If the drain housing is molded into the bucket, replacing the entire container may be safer and more practical than attempting an improvised repair.
How Do You Troubleshoot a Faulty Spin Mop Bucket Drain?
Start with a dry inspection before buying replacement parts. A systematic check can help distinguish a simple seating issue from a damaged component.
Follow these troubleshooting steps
- Empty the bucket. Pour out the dirty water using a safe method, then place the bucket on a stable surface.
- Locate the drain assembly. Identify the plug, cap, valve, and visible sealing surfaces without forcing any parts apart.
- Clean the opening. Remove loose hair and dirt with a soft cloth or suitable brush.
- Inspect the components. Look for cracks, flattened seals, damaged threads, and missing pieces.
- Reinstall the closure. Align the fitting carefully and tighten it only as directed by the manufacturer.
- Test with a small amount of water. Place the bucket where a minor leak won’t damage flooring, and watch the outlet before filling it further.
Don’t use the bucket for normal cleaning until the drain remains secure during a careful leak check. Dry the outside first so residual water doesn’t make a faulty fitting appear to leak again.
Can you repair a spin mop bucket drain yourself?
Yes, when the problem involves accessible debris, an incorrectly seated plug, or a replaceable seal. Repairs become less straightforward when the housing is cracked, the threads are stripped, or the fitting is permanently molded into the bucket.
Use only repair methods approved by the manufacturer. General-purpose adhesives, silicone sealants, and improvised rubber pieces may not bond properly to the plastic or withstand repeated contact with water and cleaning products.
Safety note: Check the bucket manufacturer’s instructions and the cleaning-product label before using chemicals. Never mix bleach with vinegar, ammonia, or other cleaners.
What if the drain won’t open?
Don’t force a stuck plug with pliers or a screwdriver. Excessive leverage can break the outlet or damage the valve mechanism.
First, remove the water if possible and clean around the accessible closure. If the mechanism remains stuck, consult the model’s instructions or contact the manufacturer before attempting further disassembly.
How Do You Choose Compatible Replacement Parts?
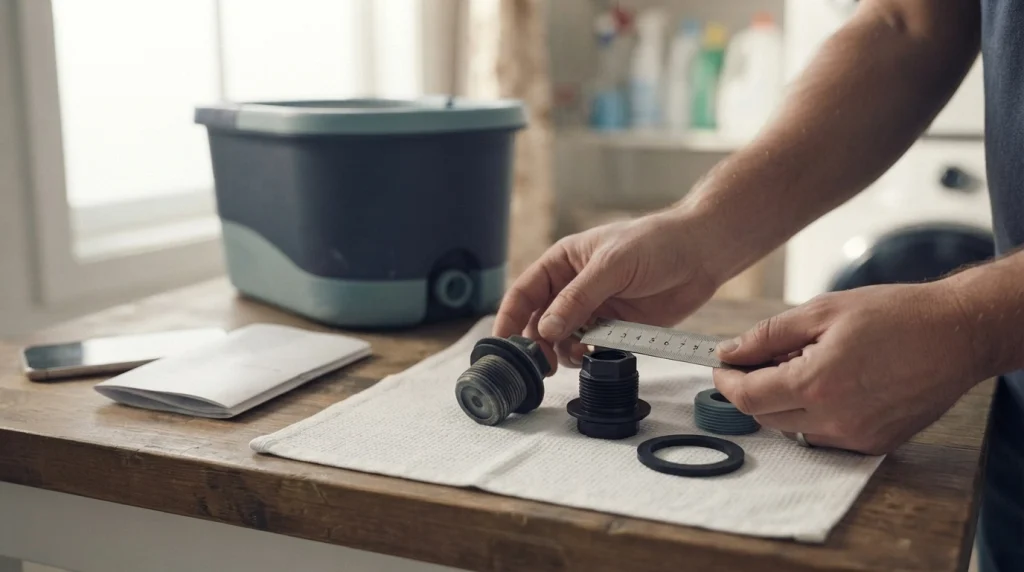
The best replacement is one designed for your exact bucket model. Similar-looking drain plugs may differ in diameter, thread pitch, sealing shape, or attachment method.
Identify the exact mop bucket model
Look for the brand name and model number on the bucket, product packaging, instruction manual, or purchase record. If the label is missing, compare the bucket’s design with the manufacturer’s official parts information.
Photographs can help identify the component, but appearance alone doesn’t establish compatibility. Ask the manufacturer or seller to confirm the fit before ordering.
Compare the important dimensions
- Outer diameter: Check the size of the plug or cap where it meets the outlet.
- Thread type: Confirm that threaded components match the original fitting.
- Seal dimensions: Match the gasket’s diameter, thickness, and cross-section when applicable.
- Attachment design: Check whether the part pushes in, screws on, clips into place, or operates as a valve.
- Material suitability: Confirm that the replacement is intended for the bucket and its normal cleaning conditions.
Measurements help narrow the options, but they shouldn’t replace model confirmation when the original component uses a specialized fitting.
Where can you find replacement drain parts?
Start with the mop brand’s customer support or official replacement-parts listings. If the manufacturer doesn’t sell the drain separately, ask whether a compatible drain assembly or replacement bucket is available.
When buying through a general marketplace, check the seller’s compatibility list and return policy. Avoid listings that claim universal fit without specifying the supported models or dimensions.
How Do You Clean and Maintain Spin Mop Bucket Drain Parts?
Regular cleaning helps prevent dirt buildup from interfering with the closure. It also makes it easier to spot early signs of wear before a minor leak becomes a bigger problem.
Clean the drain after each mopping session
- Empty dirty water promptly after cleaning.
- Rinse the accessible drain area with clean water.
- Wipe away detergent residue and loose debris.
- Check the plug or valve for trapped hair and grit.
- Allow the bucket and removable parts to dry before storage.
For routine maintenance, warm water and a soft cloth are often sufficient. Use a mild cleaning product only when the bucket manufacturer permits it.
Prevent leaks and premature wear
Handle plastic fittings gently and avoid overtightening threaded closures. Don’t leave the bucket full of dirty water for long periods or store heavy objects on top of its drain components.
Inspect the seal periodically if your model has one. Replace a damaged gasket when a compatible replacement is available rather than stretching or trimming another seal to fit.
Keep the bucket clean without damaging the floor
After draining, wipe up splashes immediately, particularly on wood, laminate, and other moisture-sensitive flooring. Even a properly repaired bucket can cause damage if wastewater pools around it.
For floor-care guidance, consult the National Wood Flooring Association and your flooring manufacturer’s maintenance instructions. Use a cleaner approved for the specific finish rather than assuming every household solution is safe.
Safety note: Never combine cleaning chemicals. Follow the product label, and check your flooring and bucket care guides before applying disinfectants or stronger cleaners.
How Do Spin Mop Drains Compare With Other Mop Systems?
A dedicated drain outlet is convenient, but it isn’t a feature shared by every floor-cleaning tool. The best system depends on how much water you use, where you clean, and how you prefer to empty or maintain the equipment.
| Cleaning system | Water handling | Main maintenance task |
|---|---|---|
| Spin mop bucket | Bucket water, often with a drain plug or manual emptying | Clean the drain, bucket, and wringer |
| Traditional string mop | Usually uses a separate bucket or wringer | Wash and thoroughly dry the mop head |
| Flat microfiber mop | Uses a damp pad, spray bottle, or separate bucket | Wash the pad and clean the frame |
| Steam mop | Uses an onboard water reservoir | Maintain the tank and washable pad |
| Cordless electric mop | May use onboard clean- and dirty-water tanks | Clean tanks, rollers, pads, and protected electrical areas |
A spin mop is often practical for routine cleaning when you want a reusable mop head and a bucket-based wringing system. A flat microfiber mop may suit small spaces better, while a steam or cordless mop introduces different maintenance needs.
Remember that drainage convenience doesn’t determine floor compatibility. For hardwood and laminate, moisture control and the floor manufacturer’s care instructions matter more than the type of mop bucket.
When Should You Replace a Drain Part or the Entire Bucket?
Replace a drain component when it is damaged, no longer seals correctly, or cannot be secured safely. Consider a complete bucket replacement when the drain housing itself has failed and no approved replacement assembly is available.
Replace an individual part when
- The original plug is missing or visibly damaged.
- A replaceable gasket has become brittle, flattened, or torn.
- A compatible cap or valve is available for the exact model.
- The outlet and surrounding bucket plastic remain intact.
Replace the bucket when
- The plastic surrounding the drain is cracked.
- The molded outlet has broken away from the container.
- The mounting threads cannot hold the closure securely.
- The manufacturer confirms that the damaged assembly isn’t replaceable.
Compare the price and availability of replacement parts with the cost of a new bucket. If the drain is integrated into the container, a complete replacement may offer a more reliable long-term solution than repeated improvised repairs.
As of 2026, the same basic buying principle still applies: verify compatibility against the exact model, not just the mop’s brand name or appearance.
Frequently Asked Questions
Can you buy spin mop bucket drain plugs separately?
Some manufacturers or sellers offer replacement drain plugs separately, but availability depends on the bucket model. Check the model number and ask the manufacturer whether it sells the plug, gasket, or complete drain assembly as an individual part.
Are spin mop bucket drain plugs universal?
No, spin mop bucket drain plugs aren’t universally interchangeable. Differences in diameter, thread design, seal shape, and attachment style can prevent a generic plug from fitting correctly. Confirm compatibility before purchasing a replacement.
Why does my spin mop bucket leak from the bottom?
Water near the bottom may come from a loose drain plug, damaged seal, cracked outlet, or split bucket body. Empty the bucket and inspect the source carefully. A crack in the container may require replacing the entire bucket.
Can I use silicone to seal a leaking mop bucket drain?
Only use a sealant if the manufacturer approves it for that specific repair. Silicone may not adhere reliably to the bucket’s plastic or restore damaged threads. Replacing a compatible plug, gasket, or drain assembly is generally preferable to an improvised repair.
How do I know which replacement drain part fits my mop bucket?
Find the brand and model number, then compare the replacement part with the manufacturer’s parts information. Check the fitting style, dimensions, threads, and seal design. If the model is unknown, send clear photographs and measurements to customer support for confirmation.
Why does my spin mop bucket still hold water after draining?
Some bucket designs retain a small amount of water because the outlet isn’t located at the lowest point. If substantial water remains, inspect the opening for debris and check the manufacturer’s draining instructions before assuming a component has failed.
How often should I clean the drain parts?
Rinse the drain area after each use and inspect it regularly for dirt, hair, and residue. Clean the plug, valve, and accessible sealing surfaces whenever buildup appears. Let the bucket dry between uses to discourage unpleasant odors and moisture accumulation.
Final Takeaway: Keep Your Spin Mop Bucket Draining Properly
A properly working drain makes a spin mop bucket easier to empty and maintain. Most troubleshooting should begin with the plug, cap, seal, and outlet before you consider buying an entirely new cleaning system.
Identify the exact bucket model, clean the accessible components, and test any repaired fitting before returning it to regular use. If the housing is cracked or the replacement part cannot be matched confidently, replacing the bucket is often the safer choice.
For everyday floor cleaning, a sound bucket is only one part of the routine. Keep the microfiber head clean, control moisture on sensitive flooring, and follow the care instructions for both your mop and your floor.