
How Long Does a Steam Mop Take to Dry?

Quick Answer
A properly steam-mopped hard floor usually becomes touch-dry in about 5–15 minutes. Tile may dry in only a few minutes, while cooler rooms, high humidity, heavy steam output, or poor airflow can push drying toward 20 minutes or longer. For wood surfaces, always follow your flooring manufacturer’s instructions and recognized wood-floor care guidance before using steam at all.
Typical Steam Mop Drying Times
- Light steam pass: Expect about 3–8 minutes on many sealed, nonporous floors.
- Average cleaning: Most floors are touch-dry within 5–15 minutes.
- Heavy steam: Multiple slow passes can extend drying beyond 15–20 minutes.
- High humidity: Moist air slows evaporation and keeps floors damp longer.
- Safe walking: Wait until the floor looks and feels completely dry.
Quick Drying Tip
- Use the lowest effective steam setting, keep the mop moving, and improve airflow with a fan or open window.
When people ask me how long a steam mop takes to dry, they’re usually asking when they can safely walk across the floor again. In normal conditions, the answer is much shorter than with a soaking-wet string mop.
Still, floor material, room humidity, mop settings, and cleaning technique can change the result. Here’s how I judge drying time when testing steam mops on different hard surfaces.
In This Guide
- How Long Does a Steam-Mopped Floor Take to Dry?
- What Affects Steam Mop Drying Time?
- How Long Does Each Floor Type Take to Dry?
- How Can You Make a Steam-Mopped Floor Dry Faster?
- Why Is My Floor Still Wet After Steam Mopping?
- Is Steam Mopping Safe for Every Floor Type?
- How Long Should You Wait Before Walking on the Floor?
- Steam Mop Drying FAQ
- What’s the Bottom Line?
How Long Does a Steam-Mopped Floor Take to Dry?
Most steam-mopped floors dry in about 5–15 minutes. A light pass across smooth tile can disappear faster, while a heavily steamed floor may need 15–20 minutes.
A steam mop is an electric floor-cleaning tool that heats water and sends hot vapor through a washable cleaning pad. Unlike a traditional string mop, it should not leave a large amount of liquid water behind.
What should a properly steam-mopped floor look like?
I expect to see a thin, even film of moisture directly behind the mop head. It should start disappearing while I’m still cleaning another part of the room.
- Normal: Light dampness that quickly evaporates.
- Too wet: Visible droplets, puddles, or water collecting near seams.
- Too much steam: The floor remains visibly wet after 15–20 minutes.
- Technique problem: Repeated slow passes leave individual areas soaked.
When I test a steam mop in a kitchen, I usually clean a small section first and start a timer. That simple test tells me more than relying on one universal drying number.
As of 2026, steam output still varies significantly between models from brands such as Shark and Bissell. Automatic steam controls can also behave differently from manual trigger systems.
What Affects Steam Mop Drying Time?
Steam volume, room humidity, airflow, temperature, and floor texture have the biggest effect on drying speed. Your cleaning technique matters just as much as the machine.
Steam setting
A high setting releases more moisture. That may help with stubborn grime on a suitable surface, but the floor will take longer to dry.
For routine cleaning, I prefer the lowest steam level that loosens the dirt. More steam isn’t automatically better.
Humidity and temperature
Warm, dry air encourages evaporation. A humid bathroom or closed kitchen can keep the same floor damp much longer.
- Warm, dry room: Usually faster evaporation.
- Cool room: Slower moisture removal.
- High humidity: Steam has less room to evaporate into the air.
- Good circulation: Moving air carries moisture away from the surface.
Mop pad condition
A saturated microfiber pad can start spreading moisture instead of absorbing loosened grime. Change the pad if it becomes soaked or heavily dirty.
Microfiber is a synthetic fabric made from extremely fine fibers. Its structure helps capture dirt while using less water than many traditional mop materials.
Added cleaning products
Most steam mops are designed around water unless the manufacturer specifically approves another product. Adding detergent, vinegar, essential oils, or disinfectant can damage some machines or leave floor residue.
If you use a separate floor cleaner, choose one approved for the flooring and follow its label. The EPA’s Safer Choice program is also useful when comparing household cleaning-product ingredients.
Safety note: Check both the steam mop manual and your flooring manufacturer’s care guide before adding any cleaner to a machine or floor.
How Long Does Each Floor Type Take to Dry?
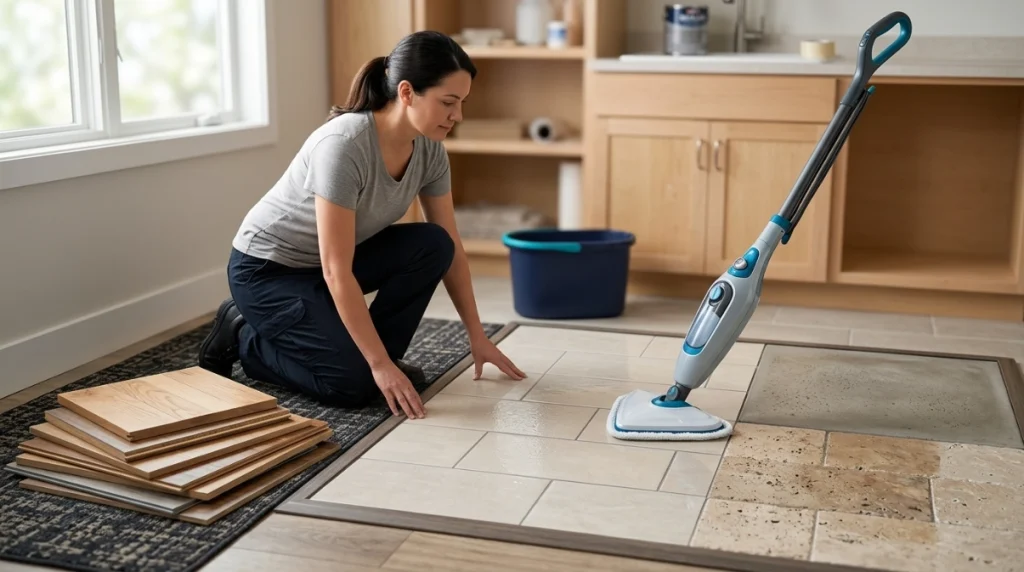
Smooth, sealed surfaces usually dry faster than textured or porous ones. Steam compatibility must be checked separately because a surface can dry quickly and still be unsuitable for steam.
These are practical household estimates for a light steam pass under normal indoor conditions. They aren’t manufacturer guarantees.
| Floor Type | Typical Touch-Dry Time | Steam Mop Guidance |
|---|---|---|
| Glazed ceramic or porcelain tile | 3–10 minutes | Commonly suitable when grout and installation are in good condition. |
| Sealed concrete | 5–15 minutes | Check the sealer’s heat and steam recommendations. |
| Sealed natural stone | 5–15 minutes | Confirm care instructions for the stone and sealer first. |
| Steam-approved vinyl flooring | 3–10 minutes | Use steam only when the flooring manufacturer explicitly allows it. |
| Hardwood or engineered wood | Not a drying-time decision | Avoid steam unless the specific floor manufacturer approves it. |
| Laminate | Not a drying-time decision | Steam can enter joints; follow the manufacturer’s instructions. |
| LVP or luxury vinyl plank | Not a drying-time decision | Use steam only when your exact product is approved for it. |
Why tile usually dries fastest
Glazed tile absorbs little surface moisture, so most water stays where airflow can evaporate it. Smooth porcelain can appear dry within minutes after a light pass.
Textured tile takes longer because tiny surface depressions hold droplets. Grout lines can also remain damp after the tile faces look dry.
Why wood, laminate, and LVP need extra caution
Drying speed doesn’t tell you whether steam is safe. Heat and moisture can enter seams or interact with finishes, adhesives, and layered flooring materials.
That is why I check the exact flooring care guide before testing steam on anything except clearly compatible hard surfaces. A five-minute drying time isn’t worth risking long-term floor damage.
Section Takeaway: Expect roughly 3–15 minutes on many steam-compatible hard floors, but treat manufacturer approval as the deciding factor for wood, laminate, and vinyl plank.
How Can You Make a Steam-Mopped Floor Dry Faster?
Use less steam, improve airflow, and clean in controlled sections. The goal is a thin moisture film, not a visibly wet floor.
- Vacuum or sweep first. Removing loose debris lets the steam mop move smoothly without repeated passes.
- Use the lowest effective steam level. Increase steam only when a compatible floor has stubborn grime.
- Keep the mop moving. Don’t hold a steaming pad in one place.
- Work backward toward the exit. This prevents you from walking across damp areas.
- Open a window or door. Fresh airflow helps moisture evaporate.
- Run a fan when needed. Aim it across the room instead of directly down at one small spot.
- Change a soaked pad. A clean, lightly damp pad manages moisture better.
For a large room, I often clean sections of roughly 5×5 feet. By the time I finish the next section, the previous one should already look noticeably drier.
Don’t use a towel to aggressively buff a freshly steamed floor unless the floor’s care instructions allow it. A clean, dry microfiber flat mop is a gentler option when excess moisture needs removing.
Wet floors are also a slip risk. OSHA’s wet-floor safety guidance reinforces the basic principle of keeping walking surfaces clean and dry.
Why Is My Floor Still Wet After Steam Mopping?
If a floor stays visibly wet for more than about 15–20 minutes, first check your steam setting, pad, technique, and ventilation. Persistent puddles aren’t what I expect from normal steam mopping.
Common causes of slow drying
- Steam output is too high: The machine releases more moisture than the room can evaporate quickly.
- You move too slowly: Lingering in one spot concentrates steam.
- The pad is saturated: A soaked pad spreads water with each pass.
- The room is humid: Bathrooms and closed kitchens can dry slowly.
- The floor is textured: Grooves and grout lines trap droplets.
- You repeated passes: Going over the same area several times adds unnecessary moisture.
What should you do?
Stop adding steam and improve airflow. If the surface allows it, pick up visible moisture with a clean, dry microfiber pad.
Check seams, edges, and low spots before assuming the floor is dry. Water often remains there after the center of each plank or tile looks normal.
If excessive wetness happens every time, inspect the steam mop. A damaged pad holder, leaking tank, poorly seated cap, or malfunctioning steam control may release too much water.
Is Steam Mopping Safe for Every Floor Type?
No. A steam mop should only be used on flooring that its manufacturer specifically considers compatible with steam. Drying quickly doesn’t make an unsuitable surface safe.
Tile is one of the most common steam-mopping surfaces, especially glazed ceramic and porcelain. Even there, cracked grout, loose tiles, or damaged sealers deserve caution.
Be careful with wood and layered flooring
Solid hardwood, engineered wood, laminate, and LVP contain joints or layered materials where heat and moisture can create problems. Some manufacturers prohibit steam cleaning entirely.
For those surfaces, I usually reach for a well-wrung microfiber flat mop and a floor-approved cleaner instead. It gives me much tighter moisture control.
A pH-neutral cleaner has a formula closer to neutral on the pH scale and is often chosen for sensitive floor finishes. Always match the product to the specific floor.
Steam cleaning is not the same as disinfecting
Don’t assume a quick steam pass automatically disinfects every floor. Effective disinfection depends on the method, surface, product instructions, and required contact time.
The CDC explains that routine cleaning and disinfecting are different processes. Cleaning is often sufficient for normal household conditions, while disinfection may be appropriate in specific situations.
Safety note: Follow your floor manufacturer’s care guide, steam mop manual, and any disinfectant label before combining heat, moisture, or cleaning chemicals.
How Long Should You Wait Before Walking on the Floor?

Wait until the floor is completely dry rather than relying on a fixed timer. For many steam-mopped hard floors, that means around 5–15 minutes.
Socks can be surprisingly risky on a slightly damp smooth floor. Shoes may also track dirt onto the surface before it finishes drying.
My simple walk-on test
- Look sideways across the floor: Damp patches often reflect light differently.
- Check grout and seams: These spots may dry later than smooth areas.
- Touch carefully: The surface should feel dry rather than cool and damp.
- Wait longer for pets and children: They move quickly and may slip on unnoticed moisture.
When I’m cleaning a busy kitchen, I divide it into zones and keep one dry route open. That avoids turning the entire room into a temporary no-walk area.
Steam Mop Drying FAQ
Can a steam-mopped floor dry in five minutes?
Yes. Smooth tile or another sealed, steam-compatible surface can become touch-dry in around five minutes when you use light steam and have good airflow. Always check seams, grout, and textured areas because they may stay damp longer.
Why does my steam mop leave so much water?
Excess water can come from a high steam setting, a saturated pad, slow movement, repeated passes, or a machine problem. Reduce the steam level, replace the pad, and check the tank and steam controls for leaks.
Should I open windows after steam mopping?
Opening a window can help when outdoor air is drier than the room. A fan or dehumidifier can also improve evaporation, especially in bathrooms, basements, and other humid spaces.
Can I walk on the floor while it is slightly damp?
It’s better to wait until the floor is fully dry. Damp smooth flooring can be slippery, and walking too soon can leave footprints or bring fresh dirt onto the cleaned surface.
Does a steam mop dry faster than a traditional wet mop?
Usually, yes. A properly used steam mop normally leaves a thinner layer of moisture than a saturated string mop, so evaporation can happen faster. Technique still matters because excessive steam can leave plenty of water behind.
How long does the steam mop itself need to dry before storage?
Empty the water tank after the machine cools and allow removable parts to air-dry according to the manual. A washed microfiber pad can take several hours to air-dry, depending on humidity and airflow, and should be completely dry before storage.
Can I put vinegar or floor cleaner in a steam mop?
Only if your steam mop manufacturer specifically allows that liquid. Many models are designed for water, and unapproved cleaners can affect internal parts or leave residue on the floor.
Safety note: Never mix cleaning chemicals unless the product labels specifically instruct you to do so.
What’s the Bottom Line?
Most properly steam-mopped hard floors take about 5–15 minutes to dry. A smooth tile floor may dry sooner, while high humidity, heavy steam, textured flooring, or poor ventilation can stretch the wait beyond 20 minutes.
Pay more attention to how much moisture you’re leaving than to the clock. A steam mop should create light dampness that begins disappearing almost immediately.
Most importantly, confirm that your floor is steam-safe before cleaning it. When in doubt, a microfiber flat mop with controlled moisture is often the safer choice.
Try timing one small section the next time you clean. You’ll quickly learn the normal drying time for your floor, room, and steam mop combination.
