
Spin Mop Handle Lock Parts: What They Do and How to Fix Them

Quick Answer
Spin mop handle lock parts keep the telescopic handle at the correct length and help secure the mop head during cleaning. Depending on the model, the locking mechanism may use a twist-lock collar, threaded connector, plastic locking sleeve, spring-loaded pin, or internal locking insert. If the handle keeps slipping, check for a loose collar, worn threads, damaged plastic, or a mismatched replacement part before buying a new mop.
Common handle lock problems
- Loose handle: The locking collar may need tightening or its gripping surface may be worn.
- Collar spins freely: The threads or internal locking insert may be stripped or broken.
- Handle separates: A threaded joint, retaining clip, or locking pin may be damaged.
- Handle will not adjust: Dried detergent, debris, or a distorted collar may be preventing movement.
- Replacement will not fit: The connector diameter, thread pattern, or locking design may differ from the original.
Quick troubleshooting tip
- Extend the handle, inspect the lock, and tighten it according to the manufacturer’s instructions. Test it with gentle pressure before using the mop on hardwood, laminate, vinyl, or tile.
A spin mop handle should stay firmly extended without wobbling or sliding while you clean. When the lock fails, even a good microfiber mop head becomes harder to control.
In this guide, I’ll explain the main handle lock parts, how to identify a faulty component, and what to check before replacing anything. I’ll also cover compatible replacement options, simple maintenance, and safe cleaning practices for different floor types.
In This Guide
- What are spin mop handle lock parts?
- Which parts make up a spin mop handle lock?
- How do you identify a faulty handle lock?
- How do you fix a loose spin mop handle?
- How do you find compatible replacement parts?
- What are the differences between handle lock types?
- How do you maintain the lock and protect floors?
- Should you repair the lock or replace the handle?
- Frequently asked questions
What Are Spin Mop Handle Lock Parts?
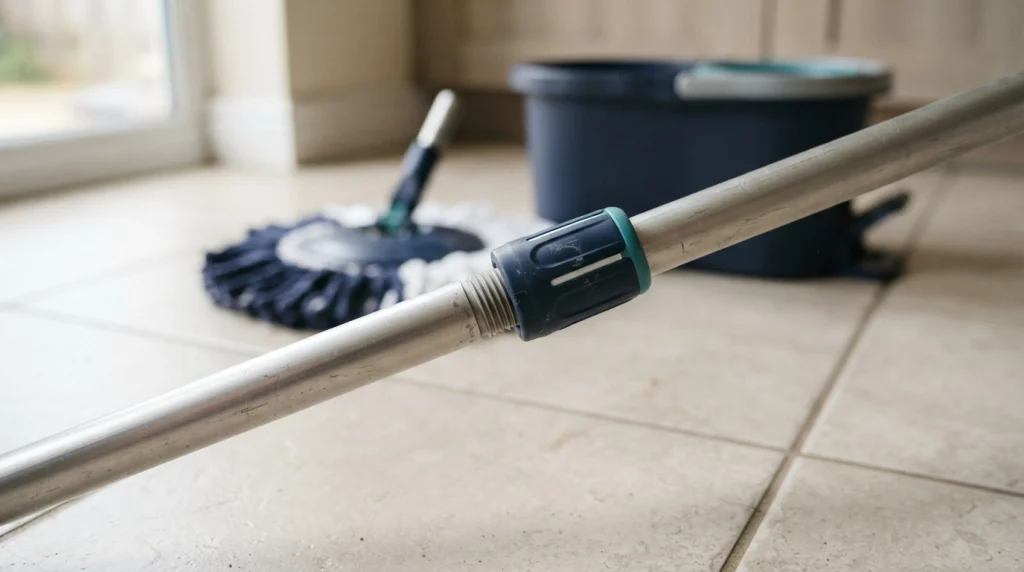
Spin mop handle lock parts are the components that secure adjustable handle sections at a chosen length. They prevent the pole from shortening unexpectedly and help maintain control when you push, pull, or rotate the mop.
How does a handle lock work?
A typical adjustable handle has two or more connected pole sections. A locking collar or internal mechanism grips one section so it stays in position relative to the other.
Some spin mops use a twist-to-lock design, while others rely on threaded joints or different mechanical retainers. The exact arrangement depends on the manufacturer and model.
Why does the locking mechanism matter?
A secure lock helps you maintain a comfortable working height and direct pressure toward the mop head. A slipping handle can make scrubbing difficult and cause the pole to collapse unexpectedly.
There is another important distinction: the handle lock is not always the same component as the mop-head connector or the spinning mechanism. A mop may have a separate joint for attaching its head and another mechanism for extending the pole.
Where is the lock usually located?
- Along the pole: A collar may sit where two telescopic handle sections overlap.
- At a threaded joint: A connector may join two pole sections or attach the handle to the mop head.
- Inside the handle: A spring-loaded pin, retaining insert, or other internal part may hold the sections together.
Before ordering a part, identify the exact joint that has failed. Replacing a mop-head connector will not solve a problem caused by a slipping telescopic lock.
Which Parts Make Up a Spin Mop Handle Lock?
The names and designs of spin mop handle lock components vary by model. Understanding the common parts makes inspection easier and helps you describe the problem accurately when looking for a replacement.
1. Locking collar
The locking collar is the sleeve or ring that turns, tightens, or otherwise engages the locking mechanism. Many adjustable poles use a collar around the point where two handle sections overlap.
If the handle slips despite tightening the collar, inspect it for cracks, worn gripping surfaces, or damaged internal threads. A collar that spins without engaging may no longer apply enough pressure to secure the pole.
2. Threaded connector
A threaded connector joins compatible parts by turning one component into another. Some handles use threaded connections between pole sections or at the mop-head attachment.
Cross-threading can make the joint sit unevenly or prevent it from tightening. Stripped threads may allow the connection to loosen repeatedly, even when you turn it carefully.
3. Locking sleeve or internal insert
A locking sleeve or insert helps the collar grip or align the handle sections. Depending on the design, this part may be separate, built into the collar, or concealed inside the pole.
If the outside collar looks intact but cannot hold the handle, an internal insert may be worn or broken. Don’t assume the insert is replaceable until you check the manufacturer’s parts diagram.
4. Spring-loaded pin or retaining clip
Some handle assemblies use a pin, clip, or similar retainer to stop connected sections from separating. These components are different from friction-based twist locks and require a compatible replacement.
A missing pin may cause looseness or separation at the joint. Avoid substituting an improvised fastener that could damage the pole or interfere with safe assembly.
5. Pole end and connecting joint
The pole end is the section that fits into the next handle piece or mop-head assembly. Its diameter, shape, and connection pattern determine whether another component will fit correctly.
Look for bent metal, cracked plastic, crushed tube ends, or damaged threads. A new collar cannot reliably repair a pole whose connecting end has lost its original shape.
| Component | Main purpose | Common warning sign |
|---|---|---|
| Locking collar | Secures adjustable pole sections | Slipping or free-spinning collar |
| Threaded connector | Joins compatible sections | Loose or uneven joint |
| Locking insert | Provides grip or alignment | Lock fails despite an intact collar |
| Pin or retaining clip | Retains connected parts | Joint separates or shifts |
| Pole end | Provides the mating surface | Bent tube or damaged threads |
**Section takeaway:** Identify the failed component before ordering anything. A locking collar, threaded joint, and internal retaining mechanism solve different problems.
How Do You Identify a Faulty Spin Mop Handle Lock?
The easiest way to identify a faulty lock is to observe what happens when you adjust the handle. Check whether the pole slides, the collar turns without gripping, or the joint separates completely.
Check the handle before disassembly
Start with the mop empty and away from the bucket. Wipe the handle dry, then inspect the locking mechanism under good lighting.
- Test for slipping: Extend the pole and apply gentle hand pressure without forcing it.
- Inspect the collar: Look for cracks, missing pieces, or visible gaps around the joint.
- Check the threads: Look for flattened ridges, cross-threading, or plastic fragments.
- Inspect the pole: Check for bending, dents, corrosion, or a crushed connecting end.
- Check the retainer: If the design uses a pin or clip, confirm that it is present and seated correctly.
Match the symptom to the likely cause
| Symptom | Possible cause | First action |
|---|---|---|
| Pole shortens during use | Loose collar or worn locking surface | Clean, inspect, and retighten correctly |
| Collar spins freely | Stripped threads or damaged insert | Inspect the locking assembly |
| Handle will not extend | Debris, a jammed lock, or a bent section | Clean exposed surfaces and check alignment |
| Joint pulls apart | Missing retainer or damaged connector | Stop using the mop until secured |
| Lock feels gritty | Dried cleaner or trapped dirt | Clean according to the care instructions |
Is the lock broken or just dirty?
Residue can make an adjustable handle difficult to turn or prevent the locking surfaces from meeting properly. If cleaning restores smooth movement and the lock holds securely, replacement may not be necessary.
However, a cracked collar, missing retainer, or stripped thread points to mechanical damage. Cleaning alone won’t restore a damaged locking surface.
Don’t force a stuck collar with pliers. Excessive pressure can crack plastic components or damage threads that might otherwise remain usable.
How Do You Fix a Loose Spin Mop Handle?
You can often resolve a loose handle by cleaning the joint and correctly engaging its locking mechanism. If a component is cracked, stripped, or missing, replace it with a compatible part instead of relying on extra tightening.
Step 1: Prepare the handle
Remove the mop from the bucket and detach the mop head if the manufacturer permits it. Place the handle on a stable surface where small components won’t roll away.
If the handle contains a spring-loaded mechanism, follow the manufacturer’s disassembly instructions. Don’t open a sealed assembly or release a spring under tension without proper guidance.
Step 2: Clean the locking surfaces
Use a soft cloth to remove dust, dried cleaning solution, and loose dirt from accessible surfaces. If the manufacturer allows damp cleaning, use a lightly dampened cloth and dry the parts thoroughly.
Avoid soaking the handle or flooding its internal mechanism. Water trapped inside a metal pole can contribute to corrosion, while excess moisture may affect some internal components.
Step 3: Re-engage the lock
Align the pole sections and operate the collar or retainer according to the design. For a twist-lock handle, use the indicated locking direction rather than assuming every model tightens the same way.
For a threaded joint, start the threads straight and turn gently. If the connector resists immediately, stop and realign it instead of forcing the pieces together.
Step 4: Replace damaged components
If the lock still slips, inspect the collar, insert, connector, and pole end for visible damage. Replace only the component the manufacturer identifies as serviceable, or replace the complete handle assembly when individual parts aren’t available.
Step 5: Test before cleaning
- Set the handle to a comfortable working length.
- Engage the lock completely.
- Apply gentle pressure in both directions.
- Confirm that the pole neither slides nor separates.
- Check the connection again before returning the mop to regular use.
**Section takeaway:** Clean first, realign second, and replace damaged parts when needed. Never depend on excessive force or improvised fasteners to keep a faulty handle together.
How Do You Find Compatible Replacement Parts?
The safest way to find a replacement is to identify the mop’s exact make and model, then compare the original component with the manufacturer’s listed spare part. Similar-looking collars and connectors are not necessarily interchangeable.
Find the model information
Check the packaging, product manual, purchase record, or label on the mop handle and bucket. Record the model number and the manufacturer’s name before searching for parts.
If the label is missing, compare the mop’s handle design, head attachment, and bucket system with official product diagrams. Don’t rely on color or overall appearance alone.
Measure the original component
When the manufacturer doesn’t provide a clear part number, measurements can help narrow the options. Measure the original parts without forcing or dismantling any sealed mechanism.
- Outer diameter: Measure across the outside of the pole or collar.
- Inner diameter: Measure the opening that receives the adjoining section.
- Connector length: Record how far the fitting extends into the pole.
- Thread details: Note the thread type and pitch if they can be identified safely.
- Locking design: Determine whether it uses twisting, threading, a pin, or another retainer.
Two connectors with similar diameters can still differ in thread pitch, locking geometry, or engagement depth. Measurements are useful, but a confirmed model-specific part number is more reliable.
Where should you look for replacement parts?
- Manufacturer support: Ask whether the collar, connector, or full handle assembly is sold separately.
- Authorized retailers: Check listings that explicitly identify your mop model as compatible.
- Replacement-part sellers: Request dimensions, clear product photos, and a model compatibility list before ordering.
- Original spare-part diagrams: Use exploded diagrams to distinguish the handle lock from the mop-head connector.
Be cautious with generic listings advertised as universal. A part may fit the pole physically but still fail to lock securely under normal cleaning pressure.
*Safety note: Follow the mop manufacturer’s assembly and maintenance instructions, and don’t use a replacement that leaves the handle unstable or the joint partly engaged.*
What Are the Differences Between Handle Lock Types?
Spin mop handles use different locking designs, and each has different maintenance and replacement needs. Identifying the mechanism helps you troubleshoot the correct component instead of replacing the entire pole unnecessarily.
Common locking designs compared
| Lock type | How it works | Typical concern | Replacement consideration |
|---|---|---|---|
| Twist-lock collar | Twisting engages a gripping mechanism | Slipping or worn grip | Match the collar and internal design |
| Threaded connector | Matching threads secure two sections | Cross-threading or stripped threads | Match thread pattern and dimensions |
| Spring-loaded pin | A pin engages a matching opening | Missing pin or failed spring | Match the original retainer assembly |
| Fixed threaded joint | Two sections screw together | Loose connection or damaged threads | Confirm thread direction and size |
Which locking type is easiest to maintain?
Accessible collars are often easier to inspect and clean than concealed internal mechanisms. However, ease of maintenance depends on the specific construction, not simply the locking style.
For example, a twist-lock handle that slips may need a replacement collar or internal insert. A pin-based handle may need a compatible retaining component instead.
Does a spin mop use the same lock as a flat mop?
Not necessarily. A spin mop may have a telescopic pole and a separate swivel or spinning-head connection, while a flat microfiber mop may use a fixed-length handle or a different adjustable joint.
Steam mops, cordless electric mops, and robot mops also use model-specific assemblies. Don’t assume a replacement intended for a conventional spin mop will fit powered equipment.
How Do You Maintain the Lock and Protect Your Floors?
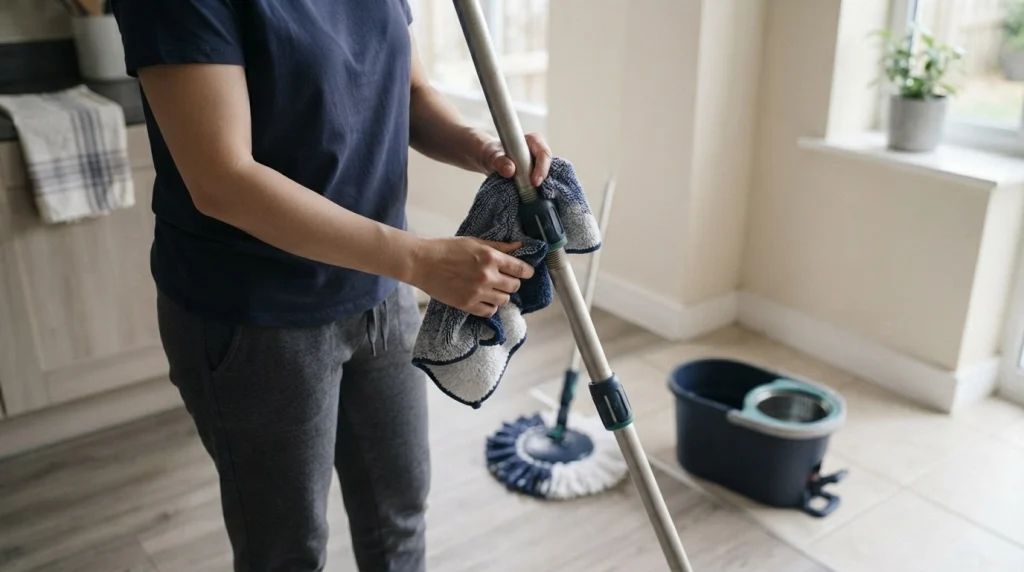
Regular inspection and gentle cleaning can help keep the handle lock working properly. A secure handle also improves control when you clean delicate surfaces or move the mop around furniture.
Keep the locking mechanism clean
After mopping, wipe away splashes and residue around the collar and exposed joints. Store the handle according to the manufacturer’s instructions, preferably in a dry location.
Avoid applying oil, grease, or household lubricants unless the manufacturer approves them. Lubricants can interfere with friction-based locks or damage certain plastics.
Adjust the handle before cleaning
Set the pole to a comfortable height before wetting the mop head. Lock it fully, then check that it stays extended when you guide the mop across the floor.
A comfortable handle can make repeated strokes easier, but avoid leaning heavily on the pole. A household mop handle isn’t designed to support your body weight.
Choose a cleaning method that suits your floor
Fixing the handle is only part of safe floor care. Excess water, unsuitable cleaners, and aggressive scrubbing can damage some surfaces even when the mop works perfectly.
- Hardwood and engineered wood: Use a well-wrung mop and a cleaner approved for the finish.
- Laminate: Avoid pooling water and follow the flooring manufacturer’s moisture restrictions.
- Vinyl and LVP: Use a compatible cleaner and avoid abrasive pads that could damage the wear layer.
- Tile: Choose a suitable cleaner for the tile and grout, accounting for any special finish.
- Natural stone: Use a stone-compatible cleaner and avoid unapproved acidic products.
- Concrete: Follow the care requirements for the specific sealant or surface finish.
For wood-floor guidance, consult the National Wood Flooring Association. Its resources can help you understand why moisture control and finish-compatible cleaning matter.
For product selection, check the relevant Bona floor-care guidance and the instructions supplied with your flooring. Product suitability depends on the surface and finish.
*Safety note: Always follow the flooring manufacturer’s care guide and the cleaner’s label. Keep wet floors clear of foot traffic until they are safe to walk on, and don’t mix cleaning chemicals.*
Can you use vinegar to clean a spin mop handle?
Vinegar isn’t necessary for routine handle maintenance and may be unsuitable for some materials. Use a mild cleaning method recommended by the mop manufacturer instead.
For floor cleaning, don’t assume a homemade vinegar solution is safe for every surface. Natural stone and some floor finishes require particular care.
For information about choosing cleaning products and using them safely, consult the U.S. Environmental Protection Agency and follow the instructions on the product you select.
**Section takeaway:** Keep the lock clean and dry, avoid unapproved lubricants, and choose floor cleaners according to the surface manufacturer’s guidance.
Should You Repair the Lock or Replace the Handle?
Repair makes sense when the problem comes from dirt, incorrect adjustment, or a replaceable component. Replacing the full handle is often the more practical option when the pole itself is bent or the locking assembly isn’t sold separately.
When a repair is worth trying
- The collar is intact and only needs correct adjustment.
- Dirt or dried cleaning solution is interfering with movement.
- The manufacturer offers a compatible replacement insert, collar, or retainer.
- The pole sections remain straight and undamaged.
When to replace the handle
- The pole is bent, cracked, or badly corroded.
- The threads are stripped and the connector cannot be replaced separately.
- The locking mechanism has failed and isn’t serviceable.
- A compatible spare part is unavailable and the handle cannot be secured reliably.
Compare the total replacement cost
Don’t compare prices alone. Consider the cost of the individual part, shipping, the availability of a complete handle, and whether the replacement will fit the existing mop head.
If the mop is older and several connections are damaged, replacing the handle or entire mop may be more sensible than repairing one component after another. Verify compatibility before spending money.
For a model-specific recommendation, contact the manufacturer with the mop’s model number and a clear photograph of the faulty joint. Ask whether the lock can be replaced independently or requires a complete handle assembly.
Frequently Asked Questions
Can I replace just the spin mop handle lock collar?
Yes, if the manufacturer sells the collar separately and the pole and internal locking components remain compatible. Some collars are integrated with other parts, so check the model’s spare-parts information before ordering.
Why does my spin mop handle keep sliding down?
A handle that slides down may have a loose collar, worn gripping surfaces, damaged threads, or a faulty internal insert. Clean accessible surfaces, engage the lock correctly, and inspect for damage before deciding whether replacement is necessary.
Are spin mop handle lock parts universal?
No. Some replacement collars and connectors fit multiple models, but many use different diameters, threads, or locking mechanisms. Confirm compatibility with the exact mop model or compare verified dimensions and connection details.
Can I glue a broken mop handle lock?
Glue is generally an unreliable fix for a locking joint that must withstand repeated twisting and pulling. It can also prevent future disassembly or damage the material. Replace the approved component or handle assembly instead.
How do I know whether the collar or internal insert is broken?
Look for cracks or obvious damage on the collar first. If the collar appears intact but cannot grip the pole, an internal insert or gripping mechanism may have failed. Consult the manufacturer’s diagram before attempting disassembly.
Can I use a replacement handle from another spin mop brand?
Only if the manufacturer or reliable compatibility information confirms that the handle fits your mop head and locking system. Similar dimensions alone don’t guarantee a secure connection, so test the assembled handle before cleaning.
Should I replace the mop if the handle lock cannot be repaired?
Not always. A compatible replacement handle may be available even when the locking mechanism isn’t sold separately. If no secure, compatible handle exists, replacing the complete mop is safer than continuing to use an unstable assembly.
Final Takeaway
Spin mop handle lock parts are small components, but they play an important role in keeping your mop stable and comfortable to use. Start by identifying the locking design, checking for dirt or damage, and confirming whether the failed component is available separately.
Choose replacement parts by model number and verified compatibility rather than appearance alone. Once repaired, test the handle securely before returning to routine floor cleaning.
If you’re troubleshooting a specific mop, the most useful details are its brand, model number, and a photo of the lock where the handle sections meet. Those details can help narrow down the correct replacement without guessing.