
Spin Mop Head Attachment Parts: Names, Functions, and Replacement Guide

Quick Answer
A spin mop head attachment connects the mop handle to the rotating base that holds the microfiber refill. Depending on the model, this assembly includes a plastic or metal head plate, a pivot joint, a threaded connector, a locking mechanism, and a removable mop head. Identify your mop’s brand and model before buying replacement parts, because attachments and refill fittings are not universally interchangeable.
Main parts and what they do
- Head plate: Supports the microfiber strands or holds a removable pad.
- Pivot or swivel joint: Lets the head tilt and turn beneath furniture.
- Threaded connector: Secures the head assembly to compatible handles.
- Locking mechanism: Keeps the attachment secure during mopping or spinning.
- Microfiber refill: Collects dust, hair, moisture, and everyday floor grime.
- Spinner docking point: Allows compatible heads to engage with the bucket’s wringer.
Before replacing a part
- Compare the attachment shape, connector size, locking style, and model number.
- Replace only the worn component when compatible spare parts are available; replace the complete assembly if its joint or mounting plate is broken.
A spin mop makes everyday floor cleaning easier, but a loose head or broken connector can turn a simple chore into a frustrating repair. Knowing the names of the spin mop head attachment parts helps you identify the problem before spending money on replacements.
In this guide, I’ll explain how the attachment fits together, which components commonly wear out, and how to choose compatible replacements for different floor-cleaning needs. The goal is to help you repair the right part without buying an entire mop unnecessarily.
In This Guide
- What Is a Spin Mop Head Attachment?
- What Are the Main Spin Mop Head Attachment Parts?
- How Do the Attachment Parts Work Together?
- How Do You Identify a Broken Attachment Part?
- How Do You Choose Compatible Replacement Parts?
- How Do You Replace Spin Mop Head Attachment Parts?
- How Do You Clean and Maintain the Attachment?
- What Are the Different Attachment Types?
- Spin Mop Head Attachment FAQs
What Is a Spin Mop Head Attachment?
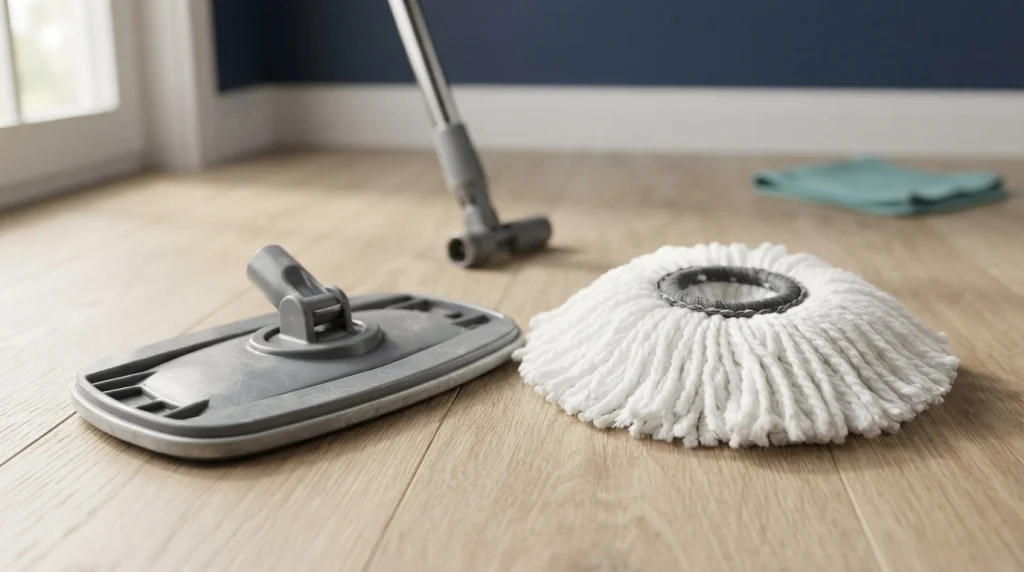
A spin mop head attachment is the assembly between the handle and the cleaning head. It supports the microfiber refill and helps the mop move across the floor while remaining connected to the handle.
Although people often call the entire assembly a mop head, the removable cleaning refill and the rigid attachment underneath it are different parts. That distinction matters when you’re ordering a replacement.
Attachment assembly versus microfiber refill
The attachment assembly contains the structural components, such as the head plate, swivel joint, and handle connection. The microfiber refill is the washable fabric component that contacts the floor and collects dirt.
Some spin mops use string-shaped microfiber refills that fasten around a circular base. Others use a removable pad secured by hook-and-loop material or a model-specific mounting system.
Why the distinction matters
- Worn fibers: Usually require a new microfiber refill rather than a complete attachment.
- Loose handle connection: May indicate a worn thread, collar, or damaged attachment socket.
- Head that will not swivel: May have a jammed or damaged pivot joint.
- Head that falls off: May have a broken latch, retaining feature, or mounting plate.
For example, a mop that leaves streaks may simply need a clean refill, while a head that separates from the handle needs a mechanical inspection. Replacing the wrong component won’t solve the underlying problem.
What Are the Main Spin Mop Head Attachment Parts?
Most spin mop attachments have a structural base, a handle connection, and a method of securing the cleaning refill. The exact arrangement depends on the manufacturer and design.
1. Mop head plate or base
The head plate is the rigid platform that supports the microfiber refill. It may be made from molded plastic, metal, or a combination of materials.
A cracked plate can cause uneven floor contact, wobbling, or a refill that no longer stays in place. Check the underside for broken clips, worn fasteners, or splits around the center connection.
2. Swivel joint or pivot connector
The swivel joint connects the head plate to the handle assembly while allowing the head to tilt and turn. This movement helps the mop reach beneath cabinets, beds, and other low furniture.
Some designs pivot in one direction, while others provide movement along multiple axes. If the head suddenly becomes stiff or floppy, inspect the joint for trapped debris, looseness, or broken plastic.
3. Threaded handle connector and collar
A threaded connector joins compatible parts by rotating them together. A threaded collar may hold the handle securely inside the attachment socket or help retain the assembly.
Not every spin mop uses the same connector. Never assume that two parts fit simply because their threads appear similar.
4. Locking tab, clip, or retaining mechanism
The locking mechanism prevents the head or refill from separating during use. Depending on the model, it may be a spring clip, snap fitting, retaining ring, or another molded feature.
A damaged lock can make the head detach during normal mopping. Avoid forcing a stuck clip, since excessive pressure can break a component that might otherwise be reusable.
5. Microfiber refill mounting system
The mounting system holds the washable cleaning material against the head plate. Common arrangements include snap-on fittings, central locking sockets, hook-and-loop pads, and model-specific clips.
Microfiber consists of very fine synthetic fibers that collect dust and absorb moisture. A clean, intact refill is essential for removing everyday grime without spreading dirty water across the floor.
6. Spinner docking feature
Many spin mop heads have a shaped connector or central feature that engages with the bucket’s wringer. The feature helps the head stay aligned while the mop spins to remove excess water.
If the mop head wobbles heavily in the wringer, inspect the docking feature and the bucket’s spinner for damage. A compatible head should engage as intended without requiring force.
7. Handle extension and connection lock
Some mop systems also include a telescoping handle with a twist lock, sliding lock, or threaded connection. Although this component sits above the head attachment, a loose handle can make the entire assembly feel unstable.
Check the handle separately before blaming the head plate. A worn extension lock may allow the handle to shorten or rotate unexpectedly during cleaning.
How Do the Attachment Parts Work Together?
The handle transfers your movement to the head assembly, while the pivot joint lets the cleaning surface adjust to the floor. The refill collects dirt, and the bucket’s wringer removes excess water when the head is properly positioned.
What happens during normal mopping?
- Handle connection: The handle stays secured to the attachment socket or connector.
- Head movement: The swivel joint lets the base change angle as you push and pull.
- Floor contact: The microfiber refill contacts the surface and lifts or collects everyday dirt.
- Wringing: The head engages with the compatible spinner, allowing excess moisture to leave the refill.
- Reset: The head returns to the floor, ready for the next cleaning pass.
Why does the head need to swivel?
A fixed head works in open spaces but can struggle around furniture legs and narrow corners. A swivel head changes angle without requiring you to reposition the entire handle constantly.
However, free movement shouldn’t mean uncontrolled wobbling. A joint that suddenly swings loosely may have a damaged retaining pin, worn socket, or cracked housing.
Why does the attachment need to fit the wringer?
The wringer relies on the head’s shape and mounting geometry to keep the assembly aligned. A mismatched attachment may sit crookedly, slip, or fail to engage correctly.
Don’t force an incompatible head into the spinner. Doing so can damage the attachment, the bucket mechanism, or the handle connection.
Section takeaway: The attachment must provide stable handle support, controlled head movement, secure refill mounting, and proper engagement with the matching wringer.
How Do You Identify a Broken Attachment Part?
Start by matching the symptom to the component most likely to have failed. A loose head, damaged refill, and broken swivel joint require different repairs.
Common symptoms and likely causes
| Symptom | Possible cause | What to inspect |
|---|---|---|
| Head detaches during use | Broken clip or retaining feature | Latch, socket, locking tab |
| Handle turns loosely | Loose threads or worn connector | Threaded socket, collar, handle end |
| Head will not pivot | Debris or damaged swivel | Pivot housing and joint |
| Head wobbles in spinner | Poor fit or worn docking feature | Head center and bucket spinner |
| Refill slips off | Worn mounting system | Clips, fasteners, refill socket |
| Floor stays dirty | Worn or contaminated microfiber | Fibers, dirt buildup, wash condition |
How can you distinguish wear from a loose connection?
Place the mop on a dry, stable surface and inspect the connection without applying force. If the connector is intact but has loosened, the manufacturer’s tightening procedure may resolve the problem.
A split socket, missing retaining tab, or visibly cracked pivot usually indicates physical damage. Tightening a broken component won’t restore its strength.
When should you stop using the mop?
Stop using the mop if the head separates unexpectedly, the handle connection is cracked, or the attachment cannot remain securely locked. A detached head can cause spills, while an unstable handle may lead to loss of balance.
Don’t glue a load-bearing joint as a substitute for a proper replacement unless the manufacturer explicitly approves that repair. Adhesives may not withstand repeated twisting, moisture, and wringing forces.
Section takeaway: Diagnose the failure before ordering anything. Replace damaged structural parts rather than trying to compensate with extra tightening or improvised repairs.
How Do You Choose Compatible Replacement Parts?
The safest way to choose a replacement is to identify the exact mop model and match the part to its original assembly. Similar-looking spin mop heads can use different sockets, mounting systems, and wringer interfaces.
Step 1: Find the brand and model number
Check the product label, original packaging, instruction manual, or manufacturer’s parts page. Look at the bucket and handle as well as the head, because the model number may appear on only one component.
For example, the Uline H-6526 mop head and handle assembly is listed as a specific replacement assembly for its Spin Mop System. That model-specific listing illustrates why identifying the system matters more than choosing a part by appearance.
Step 2: Identify exactly what needs replacing
- Refill only: Choose this when the attachment is intact but the microfiber is worn, flattened, or permanently dirty.
- Head plate: Look for a matching base when the mounting surface is cracked or damaged.
- Swivel joint: Replace it only if the manufacturer supplies a compatible joint or serviceable assembly.
- Handle connector: Match the original thread, collar, or locking design.
- Complete head assembly: Choose this when multiple structural parts are damaged or individual components aren’t available.
Step 3: Check dimensions and attachment style
Compare the replacement with the original part, including its diameter, center socket, connector shape, and overall height. A small difference in the mounting interface can prevent proper engagement.
Measurements help narrow your options, but they don’t prove compatibility on their own. The locking method and spinner connection must also match.
Step 4: Confirm the replacement’s intended mop system
Read the product description for explicit brand and model compatibility. If the listing says only “universal spin mop head,” ask the seller which handle and bucket systems it supports before purchasing.
The official O-Cedar mop head replacement and care guide provides instructions for several of its own mop systems. Its guidance also demonstrates that different mop designs can require different attachment methods.
Step 5: Compare replacement cost with the value of the mop
A refill-only replacement is usually the simplest choice when the head plate and joint remain sound. A complete assembly makes more sense when several connected components have failed or the manufacturer doesn’t sell the damaged part separately.
Compare the total cost of the part, delivery, and any additional required components against replacing the mop system. Avoid spending money on a cheap attachment that cannot securely fit your existing equipment.
Section takeaway: Model compatibility comes first, dimensions come second, and price comes last. A correctly fitting replacement is more useful than a cheaper part that cannot lock securely.
How Do You Replace Spin Mop Head Attachment Parts?
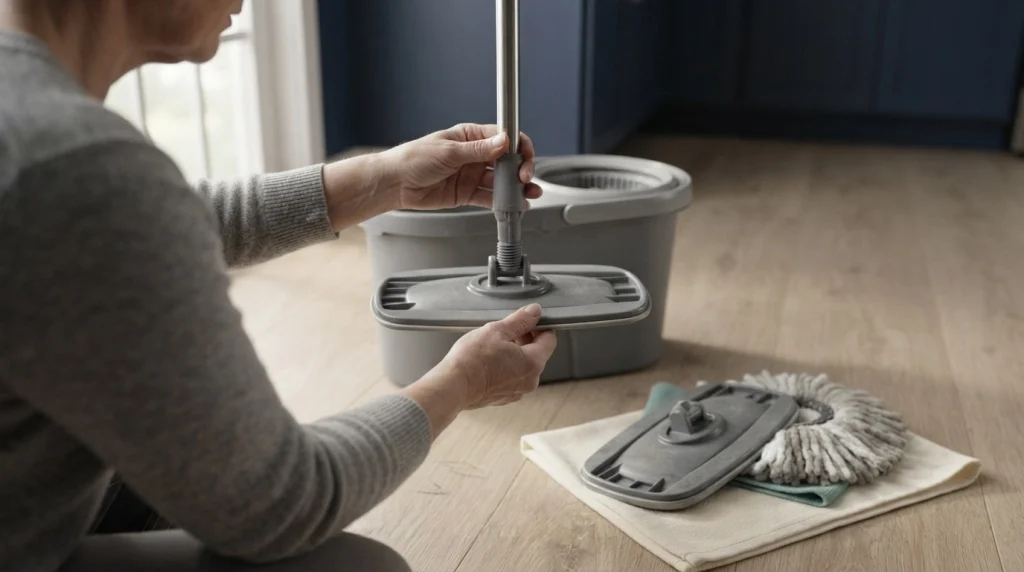
Most replaceable spin mop components can be inspected and changed with basic care, although some models require a complete head assembly. Always follow the instructions for your specific mop before disassembling its connectors.
Tools and preparation
- The correct replacement component.
- A clean towel and a well-lit work surface.
- The manufacturer’s manual, if available.
- A screwdriver or other tool only if the instructions require one.
Empty the bucket, remove the mop from the wringer, and let the attachment drain before working on it. Keep the handle and head away from children while you inspect the connection.
Replacement procedure
- Remove the refill. Release the microfiber head using its intended clips, tabs, or twist mechanism.
- Inspect the attachment. Look for cracks, stripped threads, missing clips, and debris around the pivot.
- Release the damaged component. Unscrew or unclip it according to the manufacturer’s directions; don’t force sealed joints apart.
- Compare the replacement. Check the connector, locking features, and mounting shape against the original part.
- Install the new component. Align the fittings and secure them as directed, tightening threaded parts only until properly seated.
- Refit the microfiber refill. Ensure that every retaining feature engages and that the fabric sits evenly.
- Test the connection. Move the head gently by hand and check that the handle remains secure.
How do you test the attachment after installation?
First, check the head’s movement over a dry floor without applying excessive pressure. Confirm that the swivel operates normally and the refill stays attached.
Next, test the wringer with the bucket positioned securely on a level surface. Follow the manual and stop immediately if the head slips, vibrates unusually, or fails to engage.
Never hold the spinning mop head with your hands or attempt to tighten a component while the spinner is moving. Correct any alignment issue before returning to normal cleaning.
Section takeaway: Install compatible parts carefully and test the connection before cleaning. If the joint is sealed, cracked, or not designed for disassembly, replace the approved assembly instead.
How Do You Clean and Maintain the Attachment?
Regular cleaning removes dirt that can collect around the pivot, mounting plate, and refill connection. Simple maintenance also makes it easier to distinguish ordinary buildup from actual component damage.
Clean the head plate and swivel
Remove the microfiber refill and wipe accessible surfaces with a damp cloth. Use a soft brush to loosen hair and debris around the joint without prying at retaining clips.
Keep water away from enclosed mechanisms unless the manufacturer says they are washable. Allow the attachment to dry before reconnecting it or storing the mop.
Wash the microfiber refill correctly
Follow the refill’s care label rather than assuming every microfiber head can tolerate the same washing method. Many washable refills can be hand-washed or machine-washed, but temperature and drying requirements vary.
- Remove loose hair and debris before washing.
- Use a suitable detergent according to the care instructions.
- Avoid fabric softener and bleach when the manufacturer prohibits them.
- Air-dry the refill when required by the care label.
- Replace it when the fibers become badly worn or cleaning performance declines.
For example, O-Cedar advises users to wash compatible microfiber refills in warm water, avoid bleach and fabric softener, and lay them flat or hang them to dry. Its recommendations apply to the specified products, so check your own refill’s instructions.
Protect the attachment and your floors
Use the correct amount of moisture for the floor you’re cleaning. Sealed tile and vinyl generally tolerate damp mopping better than unfinished wood or flooring with vulnerable seams.
For hardwood and laminate, excess water can create a greater problem than a slightly damp mop. Wring the refill thoroughly and follow the floor manufacturer’s maintenance instructions.
Safety note: Check both the flooring care guide and the cleaning product label before using detergents, disinfectants, or DIY vinegar solutions. Never assume that a cleaner suitable for tile is safe for natural stone, hardwood, or laminate.
When cleaning the attachment, avoid aggressive solvents and lubricants unless the manufacturer approves them. These products can damage plastic, seals, or other components.
Section takeaway: Clean the refill regularly, remove debris from accessible joints, and let components dry. Good maintenance helps prevent buildup without exposing the attachment or floor to unnecessary damage.
What Are the Different Attachment Types?
Spin mop attachments differ in how they connect to the handle, move across the floor, hold the refill, and engage with the wringer. Understanding these designs helps you identify the right replacement style.
| Attachment type | Typical feature | What to check |
|---|---|---|
| Round string-mop base | Circular base with hanging microfiber strands | Central fitting and refill locking design |
| Triangular swivel head | Angled head for maneuvering into corners | Pivot geometry and model-specific fitting |
| Flat pad attachment | Flat plate with a removable microfiber pad | Pad dimensions and fastener placement |
| Model-specific snap-on head | Proprietary clips or locking sockets | Exact manufacturer and model compatibility |
Spin mop versus flat microfiber mop attachments
A spin mop commonly uses a head designed to engage with a rotating bucket wringer. A flat microfiber mop usually holds a rectangular pad on a frame, often using hook-and-loop fasteners or clips.
These systems aren’t interchangeable simply because both use microfiber. Their head shapes, connector positions, and attachment mechanisms serve different purposes.
How do floor types affect your choice?
The attachment’s material and movement matter, but the refill and cleaning technique also influence results. A soft, clean microfiber head can work well for routine maintenance across many sealed hard floors when used correctly.
- Hardwood: Choose a compatible soft refill and use minimal moisture.
- Laminate: Avoid pooling water and keep seams from becoming saturated.
- Vinyl and LVP: Use a nonabrasive refill and a floor-approved cleaner.
- Tile: A suitable microfiber refill can collect everyday dirt and moisture.
- Natural stone: Avoid unapproved acidic cleaners and abrasive materials.
- Concrete: Check whether the surface is sealed and follow its specific care requirements.
Steam mops, cordless electric mops, and robot mops use different head assemblies and maintenance procedures. A spin mop attachment should not be substituted for a component designed for one of those systems.
Section takeaway: Choose the attachment style that matches your original mop, then select an appropriate refill and cleaning method for your floor type.
Spin Mop Head Attachment FAQs
1. Can I replace just the spin mop head attachment?
Yes, if the manufacturer sells a compatible replacement attachment separately. Some systems offer individual head plates or complete head-and-handle assemblies, while others require replacing a larger unit. Check the model number and parts diagram before ordering.
2. Are spin mop head attachments universal?
No. Attachments can differ in thread size, socket shape, pivot design, refill mounting, and spinner compatibility. A replacement described as universal may fit some systems but not others. Confirm the supported models before purchasing.
3. Why does my spin mop head keep falling off?
A head that repeatedly detaches may have a loose connector, damaged retaining clip, worn socket, or incorrectly fitted refill. Inspect the connection and follow the manufacturer’s installation instructions. Stop using the mop if its structural joint cannot remain secure.
4. Can I repair a cracked plastic mop head attachment?
A cracked load-bearing attachment is generally safer to replace with an approved component than to glue. Adhesives may not withstand repeated twisting, moisture, and wringing. If the manufacturer offers a serviceable replacement plate or complete assembly, use the specified part.
5. How often should I replace the spin mop attachment?
There is no universal replacement schedule for the structural attachment. Inspect it regularly and replace it when cracks, damaged locks, worn threads, or persistent instability appear. Replace the microfiber refill separately when its fibers become worn or it no longer cleans effectively.
6. How do I know which replacement mop head fits my bucket?
Find the mop’s brand and model, then check the manufacturer’s compatible replacement list. Compare the head’s docking feature and dimensions with the original. If the listing doesn’t identify supported models, ask the seller before buying rather than relying on visual similarity.
7. Can a damaged attachment cause streaks on the floor?
It can contribute if the head sits unevenly or prevents the refill from contacting the floor consistently. However, streaks can also result from dirty microfiber, excess cleaning solution, hard-water residue, or an unsuitable cleaner. Inspect the attachment and clean or replace the refill before assuming the head is faulty.
Final Takeaway: Replace the Right Spin Mop Part
Understanding spin mop head attachment parts makes repairs easier and helps you avoid unnecessary replacement costs. The key components are the head plate, swivel joint, handle connector, locking mechanism, refill mount, and spinner docking feature.
Start with the exact model number, identify the damaged component, and confirm compatibility before ordering. If the attachment remains sound, a new microfiber refill may be all you need.
For more reliable floor cleaning, keep the head clean, check its connections periodically, and follow the care instructions for both your mop and your flooring. A correctly fitted attachment and a well-maintained refill help keep routine mopping simple and effective.