7 Weekly Mopping Mistakes That Ruin Clean Floors
The biggest weekly mopping mistakes are using too much water, the wrong cleaner, and dirty mop water. A safer routine uses the right prep, a damp mop, and floor-specific care.
Weekly mopping should make floors look cleaner, not wear them down. Yet many of the most common weekly mopping mistakes create streaks, sticky residue, dull finishes, and even long-term damage that takes more than a quick rinse to fix.
If your floors never seem fully clean after mopping, the problem may not be the floor itself. It is often the routine: too much water, the wrong cleaner, dirty mop water, or a one-size-fits-all method that ignores floor type and finish.
- Match the floor: Hardwood, tile, vinyl, laminate, and stone all need different care.
- Prep first: Sweep or vacuum before mopping to avoid scratching grit into the finish.
- Use less moisture: A damp mop is safer than a dripping one for most floors.
- Refresh water often: Dirty mop water spreads grime and residue back onto the floor.
- Check instructions: Manufacturer guidance matters for finishes, warranties, and specialty floors.
Why Weekly Mopping Mistakes Matter for Clean Floors in 2025
How small mopping habits create dullness, residue, and long-term damage
Weekly mopping is often the maintenance step people trust most, which is exactly why mistakes matter. A small habit repeated every week can slowly leave behind film, soften finishes, or push moisture into seams and edges.
Different floors react in different ways. Tile may tolerate a more generous damp mop, while wood, laminate, and some specialty finishes can show damage from repeated over-wetting or the wrong cleaner.
What readers are trying to fix: streaks, stickiness, odors, and uneven shine
Most people start searching for better mopping advice because the floor still looks off after cleaning. Common complaints include streaks that appear as the floor dries, a sticky feel underfoot, lingering odors, and shiny patches that do not match the rest of the room.
Those symptoms usually point to residue, trapped dirt, or moisture problems rather than a need to mop harder. If you are already dealing with a sticky finish, this guide on why floors stay sticky after mopping can help you narrow down the cause.
Mistake #1: Using Too Much Water on the Wrong Floor Type
Why hardwood, laminate, and engineered wood are especially vulnerable
Too much water is one of the biggest weekly mopping mistakes because it can seem harmless at first. On hardwood, laminate, and engineered wood, excess moisture can seep into joints, edges, and small surface gaps, which may lead to swelling, cupping, or weakened seams over time.

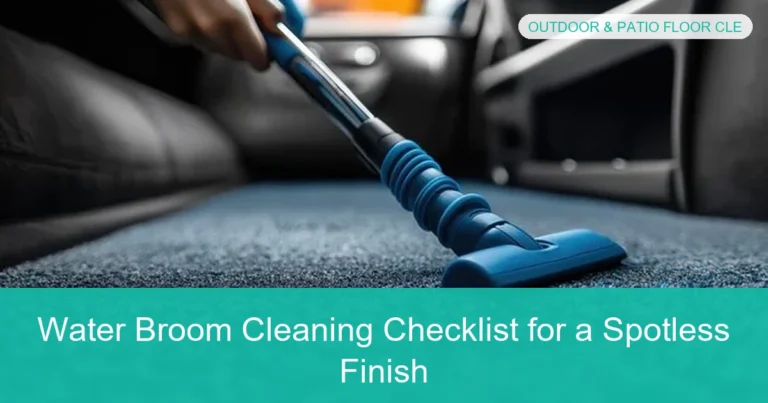
Visual guide about 7 Weekly Mopping Mistakes That Ruin Clean Floors
Image source: handymantips.org
These floors are especially sensitive because they are not built to sit in standing water. Even if the damage does not show immediately, repeated wet mopping can slowly shorten the life of the finish and the flooring structure.
When tile, vinyl, and sealed stone can handle more moisture
Tile, luxury vinyl, and some sealed stone floors can usually handle more moisture than wood-based floors, but that does not mean they should be soaked. Grout lines, seams, and worn sealants can still trap water or cleaning solution if the mop is too wet.
The safest approach is still a damp mop, not a dripping one. If you are unsure how much moisture your floor can tolerate, it is worth checking the manufacturer guidance before changing your routine.
Practical example: the “wet mop” approach that warps planks and weakens seams
A common mistake is using a heavily saturated mop bucket and dragging water across the floor until puddles are left behind. That “wet mop” method may look thorough, but on sensitive flooring it can push moisture into plank seams and create long-term problems.
Avoid This
Do not leave standing water on wood, laminate, or engineered floors. If the floor still looks wet after mopping, the mop was probably too damp for that surface.
Mistake #2: Choosing the Wrong Cleaner for the Surface
pH, residue, and why all-purpose cleaners are not always floor-safe
Not every cleaner is designed for every floor. Some all-purpose products leave behind a film, while others may be too harsh for sensitive finishes or too weak to remove greasy buildup in busy areas.
Cleaner pH matters too, especially on natural materials and specialty finishes. A product that works well on one surface can dull another, so the safest choice is usually a cleaner made for the specific floor type.
Floor-type compatibility: hardwood vs. tile vs. luxury vinyl vs. natural stone
Hardwood often needs a gentle, wood-safe formula that does not strip finish or leave residue. Tile can usually handle stronger cleaning than wood, but grout and sealant still need care. Luxury vinyl typically does best with a mild cleaner that rinses clean, while natural stone often needs a stone-safe product that avoids etching.
If you use the same bottle on every floor in the house, that convenience can become a problem. A product that is safe for one room may be the reason another room looks cloudy or dull.
Common mistake: vinegar, bleach, or oil-based products that leave buildup
Vinegar is a popular DIY choice, but it is not safe for every floor, especially natural stone. Bleach can be too harsh for many finishes and may cause discoloration or damage if used incorrectly. Oil-based products can leave a slippery or cloudy buildup that attracts more dirt.
For a deeper look at one common DIY option, see how to mop floors with vinegar and note the floor types where it should be avoided. If you are trying to disinfect, it is also worth checking what to mop floors with to disinfect so you do not trade cleanliness for residue.
Mistake #3: Mopping Without Sweeping or Vacuuming First
How grit turns weekly mopping into a scratch-making routine
Mopping over grit is one of the easiest ways to damage a floor while trying to clean it. Tiny bits of sand, pet litter, crumbs, and dried mud can act like sandpaper when dragged across the surface.
Instead of lifting dirt away, the mop can grind it into the finish. Over time, that creates tiny scratches, cloudy patches, and a floor that looks worn even after regular cleaning.
Best prep order for busy homes, pets, and high-traffic entryways
The best weekly routine usually starts with dry debris removal. Sweep, dust mop, or vacuum first, especially in entryways, kitchens, and pet areas where grit collects quickly.
If you have a busy home, this step matters even more. A few extra minutes of prep can save you from repeatedly pushing the same dirt around the floor.
Real-world example: dragging sand across sealed floors and dulling the finish
Think of a sealed floor near a back door after a rainy week. If sand and grit stay in place, a wet mop can drag them in long strokes across the room, leaving dull trails that are hard to ignore once the floor dries.
Use a dry microfiber dust mop or vacuum attachment before every weekly mop. It is the simplest way to reduce scratches and make the mop work on actual soil, not loose debris.
Mistake #4: Reusing Dirty Mop Water or an Overloaded Mop Head
Why cloudy water spreads grime instead of removing it
Once mop water turns cloudy, it is no longer helping much. Reusing dirty water can spread soil, grease, and residue right back onto the floor, which is why some floors look worse after cleaning than before.
An overloaded mop head causes a similar problem. If the mop is holding too much dirty solution, it can smear grime instead of picking it up.
How often to rinse, wring, and refresh water during a weekly clean
There is no single rule for every home, but the basic idea is simple: rinse and refresh before the water looks dirty. In high-traffic homes, that may mean changing water partway through the job rather than waiting until the end.
Also wring the mop well. A damp mop usually cleans better than a soaking one, and it is safer on floors that do not like extra moisture.
Comparison note: microfiber pads vs. string mops for cleaner results
Microfiber pads often give more controlled moisture and are easier to rinse clean between sections. String mops can work well for certain messes, but they may hold more dirty water if they are not maintained carefully.
| Method / Product | Best For | Be Careful With |
|---|---|---|
| Microfiber mop pad | Routine weekly cleaning, controlled moisture, quick rinsing | Very rough scrubbing on delicate finishes |
| String mop | Large tile areas and heavier soil when rinsed often | Overloading with dirty water and leaving excess moisture |
| Spray mop | Light maintenance on compatible floors | Residue from the wrong refill solution |
Mistake #5: Letting Floors Air-Dry with Streaks, Puddles, or Residue
Why excess solution leaves sticky film on tile and vinyl
If a floor dries with a sticky feel, the problem is often too much cleaner, too much water, or both. Tile and vinyl can show this clearly because the residue sits on top of the surface and catches dust fast.
Air-drying is not the issue by itself. The issue is letting a floor air-dry after it has been over-wet or over-solutioned, which can leave visible streaks and a tacky finish.
How to prevent streaking on glossy floors, dark floors, and polished stone
Glossy floors and dark floors tend to show streaks more easily than matte surfaces. Polished stone can also reveal every uneven pass, especially if the cleaner dries before you finish the section.
Use a light hand, work in smaller sections, and keep the mop head clean. If needed, follow with a dry microfiber cloth to even out the finish before the water dries in place.
Quick drying tips: airflow, towel-drying edges, and section-by-section mopping
Good airflow helps, but the real fix is preventing excess moisture in the first place. Open a window if appropriate, run a fan, and towel-dry edges where water tends to collect near baseboards or under cabinets.
If you want a deeper walkthrough on drying methods, see how to dry a floor after mopping. That guide is especially useful if your floors often look streaky after a weekly clean.
Some streaking is not a sign of poor drying alone. It can also mean the cleaner is leaving residue, the mop is dirty, or the floor finish is starting to wear unevenly.
Mistake #6: Ignoring Manufacturer Care Instructions and Finish Limits
When weekly mopping conflicts with waxed, sealed, or specialty-finished floors
Not all floors are meant to be cleaned the same way forever. Waxed floors, delicate sealants, and specialty finishes may react badly to a routine that works fine on standard tile or vinyl.
Even if a product seems gentle, it may still conflict with the finish on your floor. That is why manufacturer instructions matter, especially for expensive or recently installed surfaces.
Signs your floor needs gentler care than a standard cleaning routine
If the floor starts looking hazy, patchy, or overly shiny in some areas and dull in others, the finish may be telling you something. Other warning signs include peeling, soft spots, white film, or a surface that seems to change after each cleaning.
Those signs do not always mean the floor is damaged beyond repair, but they do mean the routine may be too aggressive. At that point, gentler cleaning is usually safer than trying a stronger product.
When to ask a flooring professional before using a new product or method
If you are dealing with an expensive floor, an older finish, a warranty concern, or a stain that does not respond to normal cleaning, ask a flooring professional before experimenting. That is especially true for natural stone, specialty wood finishes, or floors you do not fully recognize.
Avoid This
Do not assume a product labeled safe for floors is safe for your specific floor. Always check compatibility with the exact material and finish, not just the room type.
Mistake #7: Treating Weekly Mopping as a One-Size-Fits-All Routine
How room-by-room conditions change the right cleaning method
Kitchen floors, bathroom floors, entryways, and bedrooms do not collect the same mess. A kitchen may need more degreasing, a bathroom may need gentler moisture control, and an entryway may need more dry debris removal than solution.
That is why a single weekly method rarely works perfectly everywhere. The right routine depends on traffic, spills, pets, footwear, and the sensitivity of the floor material.
Cost and effort comparison: quick maintenance mopping vs. repair from damage
Light maintenance mopping usually costs less in time, product, and effort than repairing residue buildup or moisture damage later. Once a floor is scratched, warped, or dulled, the fix can become far more involved than a weekly clean.
Cost Note
Spending a little more time on prep, drying, and the right cleaner is usually cheaper than replacing pads, stripping residue, or paying for floor repairs after repeated mistakes.
Final recap of the safest weekly mopping habits for long-lasting clean floors
The safest weekly mopping routine is simple: remove grit first, use the right cleaner, keep the mop damp instead of soaking, refresh dirty water, and dry the floor well. Just as important, match the method to the floor type instead of assuming every surface wants the same treatment.
If you want to improve your routine even further, it can help to review how to mop a floor properly and compare it with your current habits. For hardwood-specific care, how often you should mop hardwood floors is a useful companion guide.
Weekly mopping should protect your floors, not slowly wear them down. Once you avoid these common mistakes, clean floors usually stay cleaner longer, look more even, and need less rescue work later.
🎥 Related Video: AVOID these 3 wood floor cleaning mistakes every person makes!#floorcleaning #woodfloors
📺 Edge Cleaning Clips
Frequently Asked Questions
Streaks usually come from too much cleaner, dirty mop water, or letting the floor dry unevenly. Glossy and dark floors tend to show the problem more clearly.
No, different floors need different moisture levels and cleaners. Hardwood, laminate, vinyl, tile, and stone all have different limits.
Vinegar is not safe for every floor, especially natural stone. It can also leave issues if it is used too often or mixed too strong.
Change it whenever it becomes cloudy or dirty enough to spread grime back onto the floor. Busy homes may need fresh water partway through the job.
Use a damp mop instead of a soaking one, then improve airflow and towel-dry edges if needed. Section-by-section cleaning also helps prevent puddles and streaks.
Ask a professional if you have an expensive floor, a special finish, a warranty concern, or damage that does not improve with normal cleaning. This is also wise if you are unsure which cleaner is safe.