
Patio Tiles Cleaning Checklist for a Spotless Finish

A patio tiles cleaning checklist helps you clean safely by matching the method to the tile type, finish, and stain level. The key is to sweep first, use the right cleaner, rinse well, and avoid harsh products that can damage outdoor floors.
A good patio tiles cleaning checklist helps you clean smarter, protect the surface, and avoid the kind of damage that shortens the life of outdoor flooring. Whether your patio is porcelain, stone, or textured pavers, the right routine makes a big difference in appearance and long-term care.
- Match the material: Porcelain, stone, and pavers need different care.
- Prep first: Remove debris before any wet cleaning starts.
- Use gentle tools: Soft brushes protect tile and grout finishes.
- Rinse fully: Residue can leave patios sticky or dull.
- Know when to stop: Cracked grout, loose tiles, or recurring mold may need a pro.
Why a Patio Tiles Cleaning Checklist Matters for Long-Lasting Outdoor Floors
Outdoor tile collects more than visible dirt. Leaves, pollen, mildew, sunscreen residue, grill grease, and tracked-in grit can all settle into grout lines and textured finishes.
A simple checklist keeps the process organized and helps you avoid rushing into the wrong cleaner or tool. That matters because patio surfaces often vary more than indoor floors, and what works on one finish may dull, stain, or etch another.
For homeowners who already follow a weekly mopping cleaning checklist indoors, the outdoor version is a useful seasonal extension. It gives you a repeatable routine for maintenance instead of waiting until the patio looks heavily soiled.
Clean patio tiles on a mild, dry day when the surface is cool. Products dry more evenly, and you are less likely to leave streaks or residue behind.
Identify Your Patio Tile Type Before You Start Cleaning
Before you mix a cleaner or grab a brush, identify the tile material and finish. That one step helps you avoid avoidable damage and choose the safest method for your floor.
Porcelain and ceramic patio tiles
Porcelain and ceramic are usually the easiest outdoor tiles to maintain, especially when they have a glazed finish. They can often handle neutral cleaners, soft-bristle brushing, and careful rinsing without much trouble.
Still, textured or matte versions can hold dirt in the surface pattern, so you may need a little more dwell time and agitation. Always check whether the tile is rated for outdoor use and whether the grout needs special care.
Natural stone patio tiles: slate, travertine, and limestone
Natural stone needs more caution because it can react badly to acidic products and harsh scrubbing. Slate, travertine, and limestone may also be sealed or unsealed, which changes what is safe to use.
If you are not sure whether the stone is sealed, test a small hidden area first. When in doubt, use a pH-neutral cleaner and a soft brush, and avoid anything that promises a fast “deep clean” without mentioning stone compatibility.
Concrete pavers and textured outdoor tiles
Concrete pavers and heavily textured tiles are durable, but they can trap dirt in pores and grooves. This makes them look dull even after a quick rinse.
They often benefit from sweeping, spot treatment, and a more thorough scrub than smoother tile types. Pressure washing may be possible in some cases, but it should be used carefully so you do not erode grout or lift surface coatings.
Patio Tiles Cleaning Checklist: Tools, Products, and Prep Steps
Good prep makes the rest of the job easier. Before cleaning, gather the right supplies and clear the space so you can work across the whole patio without stopping and starting.
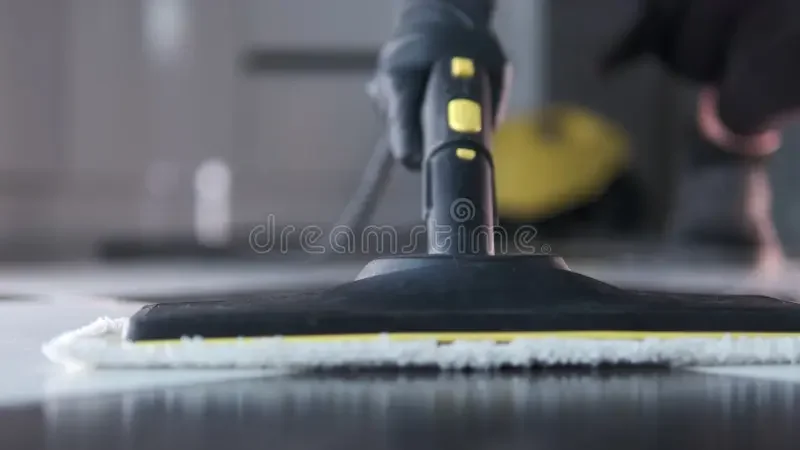
Gather safe cleaning supplies for outdoor tile surfaces
Choose tools that match the floor type. In many cases, you will need a broom or leaf blower, a bucket, a soft or medium-bristle brush, microfiber cloths, and a cleaner that is labeled safe for your surface.
For most patio tile jobs, a neutral pH cleaner is the safest starting point. If you are dealing with algae, mildew, or greasy buildup, use a product made for outdoor hard surfaces rather than a strong all-purpose formula that may be too aggressive.
- Broom, leaf blower, or vacuum suitable for outdoor debris
- Bucket and clean water
- Soft-bristle or medium-bristle scrub brush
- pH-neutral cleaner or surface-safe outdoor tile cleaner
- Microfiber cloths or mop heads
- Garden hose or low-pressure rinse setup
Clear furniture, sweep debris, and pre-rinse the patio
Move furniture, planters, mats, and decor off the area if possible. This gives you full access to corners and helps prevent dirt from being pushed back under legs and edges.
Sweep or blow away loose debris first, then pre-rinse the surface to loosen dust and surface dirt. Pre-rinsing is especially helpful if the patio has been dry for a long time, because grit can scratch the finish during scrubbing.
If your patio drains slowly, avoid flooding the area with water. Standing moisture can leave mineral marks, slow drying, and encourage new mildew growth in shaded spots.
Step-by-Step Patio Tiles Cleaning Checklist for a Spotless Finish
This checklist works best when you move in order: dry clean first, treat stains second, scrub details third, and rinse thoroughly at the end. That sequence prevents dirty water from spreading across already-clean areas.
Dry cleaning: remove dust, leaves, and grit
Start with a thorough dry pass. Use a broom, dust mop, or blower to remove leaves, sand, soil, and loose debris from the tile surface and grout lines.
Pay attention to corners, steps, and edges near walls or planters. Those areas often collect the most grit and can make the whole patio look dirtier than it really is.
Spot-treat stains, mildew, and algae buildup
Identify the main problem spots before scrubbing the whole floor. Common patio issues include food spills, rust marks from furniture, black mildew patches, and green algae in damp shade. [Source: Healthline]
Apply the right cleaner to each stain type and let it sit only as long as the label recommends. On delicate materials, test first and avoid strong spot treatments that could discolor the tile or grout.
Do not mix cleaners, especially bleach and vinegar or bleach and ammonia. That can create dangerous fumes and may also damage grout, sealers, or nearby plants.
Scrub grout lines and textured tile edges
Grout and texture usually need more attention than the flat tile face. Use a brush that can reach into grooves without gouging the surface, and work in small sections so the cleaner does not dry too quickly.
If grout is discolored but not damaged, a gentle scrub may be enough. If the grout is crumbling, missing, or deeply stained, cleaning alone may not solve the problem and restoration could be needed.
Rinse thoroughly and dry without leaving residue
Rinse until the water runs clear and no cleaner film remains. Soap residue can make the patio feel sticky, attract dirt faster, and leave a hazy look on smooth tiles.
After rinsing, let the patio air-dry or wipe problem areas with a clean microfiber cloth. This is especially helpful on dark tile, where dried water spots and mineral marks can stand out.
If you have ever dealt with indoor residue issues, the same idea applies outdoors. Harsh cleaning can leave a film that attracts more soil, similar to the problems covered in why spring cleaning leaves floors sticky.
Best Cleaning Methods by Patio Tile Material and Finish
The safest patio cleaning method depends on both the material and the surface finish. A glazed porcelain tile, for example, can usually tolerate a different routine than porous stone or rough concrete pavers.
Safe methods for glazed, matte, and textured tiles
Glazed tiles generally respond well to mild cleaner, soft scrubbing, and a full rinse. Matte and textured tiles may need a longer dwell time and a brush that can reach into the surface pattern.
Avoid overly slick cleaners or waxy products on outdoor tile. They can make the surface look shiny in patches and may create slip concerns, especially in damp weather.
What to use on sealed vs. unsealed stone surfaces
Sealed stone is usually easier to maintain because the sealer helps slow absorption. Even then, use a cleaner that is safe for natural stone and do not assume a sealer makes the floor stain-proof.
Unsealed stone is more vulnerable to stains, water marks, and chemical etching. For these floors, gentler cleaning is usually better than aggressive scrubbing, and sealing may be worth discussing if the surface gets heavy use.
- Neutral cleaner on sealed stone
- Soft brush on matte porcelain
- Careful spot treatment on textured pavers
- Acidic products on limestone or travertine
- Over-scrubbing polished finishes
- Unlabeled cleaners on unsealed surfaces
Pressure washing: when it helps and when it damages tiles
Pressure washing can help remove embedded dirt from some concrete pavers and heavily soiled outdoor tile, but it is not the first choice for every patio. Too much pressure can strip joint material, weaken grout, or leave uneven marks on softer surfaces.
If you use a pressure washer, keep the pressure low, use a wide fan tip, and stay at a safe distance. For natural stone, older grout, or tile with loose areas, hand cleaning is usually the safer option.
| Method / Product | Best For | Be Careful With |
|---|---|---|
| pH-neutral outdoor cleaner | Most porcelain, ceramic, and sealed stone | May need more dwell time on heavy buildup |
| Soft-bristle brush | Glazed, matte, and lightly textured tiles | Can be too gentle for deep pores |
| Pressure washer | Some concrete pavers and durable surfaces | Loose grout, soft stone, and chipped edges |
Common Patio Tile Cleaning Mistakes That Can Cause Damage
Many patio problems come from using the wrong product too quickly. A careful approach protects both the tile and the grout, especially on older or more decorative outdoor floors.
Using acidic cleaners on natural stone
Acidic cleaners can etch limestone, travertine, marble, and some other stone surfaces. The damage may look like dull spots, rough patches, or permanent marks that do not rinse away.
For stone patios, safer is usually better than stronger. When a stain is stubborn, it is worth checking whether the issue is dirt, mineral buildup, or actual surface damage before using a more aggressive cleaner.
Scrubbing with abrasive tools that scratch the surface
Steel wool, stiff wire brushes, and abrasive pads can scratch glazed tile and wear down softer finishes. On textured surfaces, they may also leave the top layer looking uneven.
Choose the least aggressive tool that still does the job. If you need more cleaning power, switch to a better-suited cleaner before you switch to a harsher brush.
Leaving soap film, hard water spots, or moisture behind
Soap film can make outdoor tile feel tacky and attract dust faster. Hard water spots often show up after rinsing if minerals are left behind on smooth or dark surfaces. [Source: Britannica]
Moisture left in corners, grout lines, or shaded areas can also lead to recurring mildew. A final rinse and proper drying are small steps that help prevent repeat cleaning.
For more on residue and film issues, the same general logic applies to indoor cleaning mistakes discussed in daily floor cleaning mistakes.
When to Call a Flooring Professional for Patio Tile Cleaning or Restoration
Some patio problems are bigger than routine cleaning. If the floor is expensive, fragile, or showing signs of structural wear, a flooring professional may be the safer next step.
Deep staining, cracked grout, or loose tiles
If stains stay after repeated gentle cleaning, the issue may be below the surface. Cracked grout and loose tiles can let water move underneath, which may worsen damage over time.
Professional help is especially useful when you are unsure whether the patio needs cleaning, regrouting, replacement, or both. Guessing can make repairs more expensive later.
Sealing needs, efflorescence, and recurring mold issues
Efflorescence looks like a white powdery deposit and usually points to moisture movement through the tile or grout. Recurring mold or algae may also signal drainage, shade, or sealing problems rather than just surface dirt.
If the patio keeps getting dirty quickly after cleaning, ask whether the surface needs resealing or a different maintenance plan. This is one of the clearest moments to bring in a pro, especially for natural stone or high-value tile.
Cost Comparison, Maintenance Frequency, and Final Recap for Homeowners
The right patio care plan depends on how large the area is, how dirty it gets, and whether you are using basic supplies or specialty products. A regular maintenance routine usually costs less than waiting for deep buildup to form.
DIY cleaning vs. professional patio tile cleaning costs
DIY cleaning is often the most budget-friendly option when the patio only needs sweeping, washing, and light stain treatment. Your main costs are usually cleaner, brushes, replacement pads, and water use.
Professional cleaning may make more sense for large patios, delicate stone, severe staining, or restoration work. It can also be worth considering when the surface has sealing concerns, damaged grout, or repeated mold growth that keeps coming back.
For long-term value, a slightly better cleaner or a softer brush is often cheaper than repairing scratched tile or etched stone later. If you clean seasonally, keep a small supply of surface-safe products on hand so you do not overbuy specialty items you may not need.
Seasonal maintenance schedule for 2025 outdoor living spaces
A practical schedule is simple: sweep or blow debris weekly, rinse after heavy pollen or storms, and do a deeper clean when the patio starts to look dull or slippery. In many homes, that means a more thorough cleaning at the start of spring, after peak summer use, and again before colder weather.
Homeowners who like structured routines often do well with a broader checklist system. If you are organizing the whole home, a spring cleaning checklist for a fresh home can help you pair patio care with other seasonal tasks.
Quick recap of the patio tiles cleaning checklist for a spotless finish
Start by identifying the tile type, then gather safe tools and clear the patio. Dry clean first, treat stains carefully, scrub grout and texture as needed, and rinse well so no film or residue remains.
When the surface is stone, damaged, or repeatedly dirty, stop before you overdo it and consider professional help. A careful patio tiles cleaning checklist keeps outdoor floors looking better while reducing the risk of scratches, etching, and moisture-related problems.
Frequently Asked Questions
A pH-neutral cleaner is usually the safest starting point for most patio tiles. For mildew, algae, or grease, choose a product labeled safe for your specific tile material.
Vinegar can damage natural stone like limestone, travertine, and marble. It is safer to avoid acidic cleaners unless the tile manufacturer says they are compatible.
Sweep or remove debris weekly if the patio gets regular use. Do a deeper clean seasonally or whenever dirt, mildew, or slippery buildup starts to appear.
It can be safe for some concrete pavers and durable surfaces if used carefully. Avoid high pressure on loose grout, soft stone, or fragile tile edges.
Use a brush and a surface-safe cleaner, working in small sections so the product does not dry too fast. If grout is cracked or missing, cleaning alone will not fix it.
Call a professional if stains will not lift, tiles are loose, grout is damaged, or mold keeps returning. Professional help is also smart for expensive stone or sealing concerns.
