Beginner Guide to Move-Out Cleaning – Easy Steps Explained
Move-out cleaning is easiest when you work room by room, clean from top to bottom, and finish with floors last. Use floor-safe products and ask for help if you see damage, deep stains, or an unknown finish.
Move-out cleaning can feel overwhelming when you are already focused on packing, schedules, and the handoff to the next person. This beginner guide to move-out cleaning breaks the job into simple room-by-room steps, with floor-safe advice that helps you clean thoroughly without causing damage.
Whether you are a tenant hoping to protect a deposit or a homeowner preparing a property for sale or transfer, the goal is the same: leave the home clean, safe, and inspection-ready. A smart plan matters more than scrubbing harder, especially when different surfaces need different care.
- Room order: Declutter, dust, scrub, then clean floors last.
- Floor safety: Match the method to hardwood, laminate, tile, vinyl, or carpet.
- Common misses: Baseboards, switches, vents, and door frames matter.
- Damage risk: Too much water and harsh chemicals can cause problems.
- When to hire: Deep stains, scratches, or water damage may need a pro.
Beginner Guide to Move-Out Cleaning: What Tenants and Homeowners Need to Know in 2025
Move-out cleaning is deeper than regular weekly upkeep, but it does not have to be complicated. The main difference is that you are cleaning for a final walkthrough, so attention to detail matters in places people often ignore during everyday routines.
For tenants, the best starting point is the lease, move-out checklist, or property notes from the landlord or management company. For homeowners, the focus may be on presentation, staging, or making the space easier for buyers, inspectors, or movers to enter safely.
In 2025, the practical approach is still the same: clean from top to bottom, dry surfaces properly, and use products that match the floor finish. If you are unsure about a cleaner, test it in a hidden spot first. That small step can prevent dulling, streaking, or finish damage later.
Work one room at a time and finish each room fully before moving on. That keeps dust, crumbs, and cleaning residue from spreading back into areas you already completed.
If you want a broader reset before the move, a spring cleaning guide can help you organize the order of tasks. For tougher buildup in lived-in spaces, a monthly deep cleaning guide is also useful for planning a more detailed clean.
Move-Out Cleaning Checklist by Room: Kitchen, Bathroom, Bedrooms, and Living Areas
A room-by-room checklist keeps the job manageable and helps you avoid forgetting the spots most likely to be noticed during inspection. Start with the high-dust, high-grease areas, then move to spaces that only need a lighter finish cleaning.

- Remove trash, loose items, and forgotten belongings
- Dust ceilings, vents, shelves, trim, and light fixtures
- Wipe doors, handles, switches, and baseboards
- Clean cabinets inside and out
- Scrub sinks, tubs, toilets, and counters
- Vacuum, sweep, and mop or clean floors last
Kitchen: Clean appliance exteriors, inside the microwave, sink, backsplash, cabinet fronts, and counters. If allowed and needed, pull out removable shelves and clean crumbs or sticky residue inside cabinets and drawers. Grease often collects near the stove, hood, and walls behind frequently used cooking areas.
Bathroom: Focus on soap scum, hard-water spots, grout, toilet base, mirror, vanity, and behind the toilet. Check corners and edges where dust and hair collect. If there is mildew, use a bathroom-safe cleaner and avoid mixing chemicals.
Bedrooms: Remove nail holes only if the rental agreement allows it, then dust closet shelves, window sills, blinds, and baseboards. Empty drawers and check behind beds and under furniture for lost items or debris.
Living areas: Dust fans, vents, built-ins, shelves, and any visible trim. Wipe fingerprints from doors and glass surfaces. If the room has heavy traffic, the floor may need extra attention after all other cleaning is done.
High-touch spots and hidden dirt beginners often miss
Beginners often clean the obvious surfaces and miss the places that most quickly make a home look unfinished. Light switches, door frames, cabinet pulls, the tops of door edges, vent covers, and the corners behind furniture usually need attention.
Also check under appliances if they can be safely moved, behind toilets, along stair edges, and around floor transitions. These areas collect dust and grime that can stand out during an inspection even when the rest of the room looks clean.
If a surface looks clean but still feels sticky or dusty, residue may remain from the wrong cleaner or too much product. A light rinse or a cleaner reset can sometimes help, but only if the floor type can handle it.
Floor-Type Compatibility: How to Clean Hardwood, Laminate, Tile, Vinyl, and Carpet Safely
Floor care is one of the biggest move-out cleaning risks because the same method does not work safely on every surface. The finish, age of the floor, and condition of the room all matter, so use the gentlest method that still gets the job done.
Best cleaning methods for each floor type
| Method / Product | Best For | Be Careful With |
|---|---|---|
| Dry microfiber dusting | Hardwood, laminate, vinyl, and quick pre-cleaning | Heavy debris that can scratch if dragged |
| Damp mop with pH-neutral cleaner | Sealed hardwood, laminate, vinyl, and many tile floors | Excess water and overuse of product |
| Tile and grout scrub | Kitchen and bathroom tile | Harsh acids on natural stone or delicate grout |
| Vacuum with hard-floor setting | Carpet, rugs, and dust-prone edges | Loose cords, fringe, and delicate trim |
| Spot cleaning for carpet | Small stains before final walkthrough | Overwetting and spreading the stain |
Hardwood: Use minimal moisture and a cleaner made for sealed wood. A microfiber mop or lightly damp pad is usually safer than a soaking-wet mop. If the finish is worn, be extra cautious because water can seep into weak spots more easily.
Laminate: Laminate prefers very little water. A lightly damp microfiber mop works better than a wet mop bucket approach. If liquid sits on the surface too long, it can cause swelling at seams or edges.
Tile: Tile can usually handle more moisture than wood or laminate, but grout lines may need separate attention. A soft scrub brush helps lift buildup without scratching glazed tile, while a pH-neutral cleaner is often the safest starting point.
Vinyl: Vinyl is generally forgiving, but it can still dull if you use abrasive pads or strong chemicals too often. Keep the mop damp, not dripping, and avoid anything that leaves a sticky film behind.
Carpet: Vacuum thoroughly first, then spot clean stains with a carpet-safe product. If the carpet has strong odors, heavy traffic wear, or set-in stains, a professional clean may be worth considering before inspection.
What to avoid so you do not damage the finish
Do not use steam or excessive heat on surfaces that are moisture-sensitive unless the manufacturer specifically allows it. This matters especially for laminate and some wood floors, where heat and moisture can create long-term issues.
Do not use vinegar, bleach, ammonia, or abrasive scrubbers on a floor unless you know the surface can handle them. These products can dull finishes, weaken grout sealer, or leave residue that is hard to remove later.
If you are unsure about a floor type, check the manufacturer guidance or the property records. That is especially important for premium materials, older finishes, and any surface with prior water exposure or visible wear.
Best cleaning methods for each floor type
For a quick comparison, use dry dusting first, then choose the least aggressive wet method that still removes grime. That sequence helps prevent grit from turning into scratches during mopping or scrubbing.
- Sealed hardwood with a barely damp microfiber mop
- Laminate with minimal moisture and fast drying
- Tile with pH-neutral cleaner and a soft brush
- Vinyl with gentle cleaning and no abrasive pads
- Standing water on wood or laminate
- Harsh chemicals on sealed finishes
- Steam on moisture-sensitive floors
- Scrub pads that can scratch or dull the surface
Easy Step-by-Step Move-Out Cleaning Process for First-Time Cleaners
If this is your first move-out clean, the easiest way to stay organized is to follow the same order in every room. A simple sequence reduces backtracking and helps you see progress quickly.
Declutter, dust, scrub, and finish with floors last
Start by clearing every room of personal items, packing leftovers, broken objects, and trash. Emptying the space first makes dusting and scrubbing much easier.
Work from ceiling fans, shelves, vents, and light fixtures down to baseboards and trim. This keeps dust from falling onto already-cleaned surfaces.
Focus on sinks, counters, tubs, toilets, appliances, and any stuck-on residue. These rooms usually take the most time because buildup is more visible here.
Clean the high-touch areas that people notice during a walkthrough. Use a slightly damp cloth and dry the surface if needed.
Vacuum or sweep first, then mop or spot clean according to the floor type. Finishing with floors helps remove debris that fell during the rest of the cleaning.
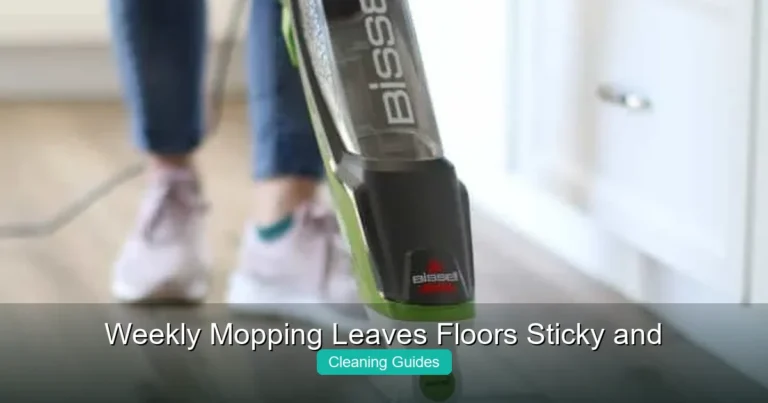
For floor care, timing matters. If you need a more detailed routine after the room surfaces are done, a weekly mopping guide can help you choose a safer mop method. If you want to avoid residue and streaks, it also helps to review a daily floor cleaning guide for lighter maintenance habits that do not over-wet surfaces.
Simple tools and products that make the job easier
You do not need a large tool kit to do a solid move-out clean. A microfiber cloth stack, a vacuum with attachments, a mop suitable for your floor type, a scrub brush, and a few surface-safe cleaners can cover most rooms.
Keep paper towels or lint-free cloths handy for mirrors, glass, and quick touch-ups. A small bucket, trash bags, gloves, and a step stool also help when you need to reach vents, shelves, and the tops of cabinets.
Use one cloth color or one set of cloths for bathrooms and another for kitchens. That simple habit lowers the chance of spreading grime or odor from one room to another.
Common Move-Out Cleaning Mistakes That Can Cause Deposit Deductions or Damage
Most move-out mistakes happen when people rush, use too much product, or clean in the wrong order. A few small errors can make a home look less finished than it actually is.
Overwetting floors, using the wrong chemicals, and skipping baseboards
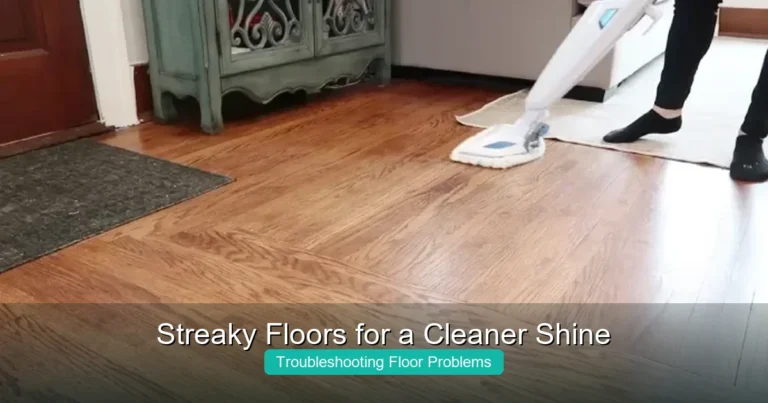
Overwetting is one of the most common floor-care problems. It can leave streaks, sticky residue, warped edges, or water marks on sensitive materials, especially if the floor is not sealed well or has existing wear.
Using the wrong chemical is another frequent issue. Harsh cleaners may damage finishes, leave a cloudy film, or create a smell that lingers. If a product label does not clearly say it is safe for your floor, choose a milder option instead.
Skipping baseboards, door frames, and edges can also make a clean room look unfinished. These details do not take long, but they strongly affect the overall impression during an inspection.
Do not mop a floor before removing grit and dust first. Dragging debris across the surface can create scratches, especially on hardwood, vinyl, and glossy tile.
For a broader look at common move-out pitfalls, it can help to review move out cleaning mistakes deposit so you can avoid the issues that often trigger complaints or re-clean requests. If you are comparing this task with other deep-clean projects, the right sequence matters just as much as the products you use.
When to Ask a Flooring Professional Before or After Move-Out Cleaning
Some floors are safe to clean yourself, but others deserve a second opinion before you start. If the surface is expensive, damaged, or unclear in terms of finish, a professional can help you avoid making a small problem worse.
Signs of deep stains, scratches, wax buildup, or water damage
Ask for help if you see dark stains that do not lift with gentle cleaning, scratches that catch your fingernail, or cloudy patches that may be wax buildup or product residue. These issues may need specialized treatment rather than more scrubbing.
Water damage is another reason to pause. Swelling at seams, soft spots, cupping, peeling, or discoloration can mean the floor needs repair or inspection before any deeper cleaning happens. Cleaning over a damaged surface can hide the issue temporarily without solving it.
If the property has natural stone, older hardwood, or a finish you cannot identify, professional guidance can also be useful. Product compatibility matters more on these surfaces, and the wrong cleaner can create a permanent change in appearance.
When in doubt, stop at safe surface cleaning and document any visible damage with photos. That protects you if the floor needs repair, and it helps you explain what was already present before move-out.
Move-Out Cleaning Costs, DIY vs. Hiring Help, and What Affects the Price
Move-out cleaning costs vary widely because homes differ in size, condition, and floor type. A small, well-kept apartment is usually much easier to handle than a large home with stained carpet, greasy kitchen surfaces, or multiple bathrooms.
Room size, floor type, condition, and time-saving comparisons
DIY cleaning is usually the lowest-cost option if you already have supplies and enough time. The tradeoff is labor: a full move-out clean can take much longer than expected, especially if you are also packing or coordinating a move.
Hiring help can save time and reduce stress, but the price depends on room count, square footage, surface condition, and whether floors need special treatment. Deep stains, pet odors, heavy grease, and delicate materials can all raise the cost because they take more care.
A good way to decide is to compare the value of your time, the risk of damage, and the chance of deposit deductions or extra re-cleaning. If the floors are in good shape and you are comfortable with the work, DIY may be enough. If the property needs detailed attention or you are short on time, help may be the better option.
Budget for supplies, replacement mop pads, carpet spot cleaner, and any cleaner refills you may need. If a floor needs professional attention, that can cost more than basic cleaning, but it may still be worthwhile for expensive or damaged surfaces.
If you want a simple way to estimate your own project, a floor cleaning cost calculator can help you compare the effort of doing it yourself versus bringing in extra help. For homes that need faster turnaround, it is often better to prioritize the most visible rooms first, then finish the floors and details last.
Final Recap: The Easiest Way to Leave a Home Clean, Safe, and Ready for Inspection
The easiest move-out cleaning plan is also the most practical: declutter first, dust from top to bottom, clean kitchens and bathrooms carefully, and finish with floors using the safest method for each surface. That order saves time and reduces the chance of redoing work.
Remember that floor compatibility is just as important as appearance. A clean-looking floor can still be damaged by too much water, the wrong chemical, or aggressive scrubbing, so always match the method to the material and finish.
With a clear checklist and careful floor care, even first-time cleaners can complete a move-out job confidently. The key is not perfection in every detail, but a clean, safe home that is ready for the final walkthrough.
Frequently Asked Questions
Start by removing trash, packing leftovers, and clearing each room. Then dust from top to bottom before scrubbing kitchens, bathrooms, and floors.
Use the gentlest method that fits the floor type. Dry sweep or vacuum first, then mop lightly with a product that matches the finish.
Beginners often miss baseboards, light switches, door frames, vents, cabinet tops, and behind appliances. These areas can affect the overall inspection result.
No, vinegar is not safe for every floor. It can dull some finishes, damage certain sealers, or leave residue, so check the floor type first.
Consider professional help if the floor has deep stains, scratches, water damage, wax buildup, or an expensive finish you do not want to risk damaging.
Usually yes, but it depends on your time, supplies, and the home’s condition. Hiring help may be worth it if the space is large, heavily soiled, or short on time.