Seasonal Patio Cleaning Checklist for a Spotless Patio
A seasonal patio cleaning checklist helps you remove dirt, stains, mildew, and debris while protecting the surface from damage. The safest results come from matching your cleaner and method to the patio material and the time of year.
A seasonal patio cleaning cleaning checklist helps you keep outdoor floors looking fresh, safer to walk on, and easier to maintain through changing weather. The key is matching your cleaning method to the patio surface, the season, and the type of buildup you’re dealing with.
- Surface first: Concrete, stone, pavers, wood, and composite all need different care.
- Seasonal rhythm: Spring, summer, fall, and winter each call for different tasks.
- Clean gently: Use the mildest effective cleaner and avoid damaging pressure.
- Protect joints: Keep sand, grout, sealers, and drainage in good shape.
- Ask for help: Call a pro for delicate materials, deep stains, or structural issues.
Seasonal Patio Cleaning Checklist: What “Spotless” Really Means in 2025
For FloorsMop readers, “spotless” does not mean using the strongest cleaner or blasting everything with a pressure washer. It means removing dirt, mildew, stains, and debris without damaging the finish, joints, or protective coating.
If you already use a regular weekly mopping cleaning checklist indoors, think of patio care as the outdoor version: less frequent, but more dependent on weather and surface compatibility.
User intent: a practical, step-by-step patio refresh for spring, summer, fall, and winter prep
This checklist is built for real outdoor maintenance, not one-time perfection. It helps you reset the patio in spring, stay ahead of summer mess, prepare for fall moisture, and protect the surface before winter.
What this checklist covers: dirt, mildew, stains, debris, and surface protection
You’ll find guidance for the most common patio problems: tracked-in soil, pollen, algae, food spills, rust marks, leaf stains, and standing-water issues. It also covers surface protection, because cleaning and preservation should work together.
Before you clean, note whether the patio is sealed, unsealed, or patched. That one detail can change which cleaner is safest.
Identify Your Patio Surface Before You Clean
Different patio materials react differently to water, chemicals, and scrubbing. A cleaner that works well on one surface can dull, etch, or loosen another.

Concrete patios: durable, but prone to porous staining and algae buildup
Concrete is sturdy, but it often absorbs stains more easily than people expect. Oil, rust, and leaf tannins can sink into the pores, while shaded areas may develop algae or mildew.
Natural stone patios: slate, limestone, travertine, and the risk of etching
Natural stone can be beautiful, but it is often more delicate than concrete. Acidic cleaners can etch limestone or travertine, and even some “all-purpose” products may leave a dull spot on softer stone.
Paver patios: joint sand, weed growth, and uneven settling
Pavers need cleaning methods that respect the joints. Too much water pressure can wash out sand, and aggressive scrubbing may worsen uneven edges or expose weed growth between stones.
Wood and composite decks adjacent to patios: why methods differ
If your patio connects to a deck, treat the surfaces separately. Wood and composite materials often need gentler cleaning, different dwell times, and lower pressure than stone or concrete.
Why surface compatibility matters before choosing cleaners or pressure settings
Surface compatibility is not just a technical detail; it determines whether cleaning improves the floor or creates a repair problem. When in doubt, test a small hidden area first and follow the material or sealer instructions if they exist.
Do not assume a “patio cleaner” is safe for every surface. Natural stone, sealed pavers, and decorative concrete can all react differently to the same product.
Seasonal Patio Cleaning Checklist for Each Time of Year
The best seasonal patio cleaning cleaning checklist breaks the work into manageable tasks. You do not need the same routine in every season, but you do need a consistent rhythm.
Spring reset: remove winter grime, pollen, and salt residue
Spring is the ideal time for a full reset. Start by removing winter debris, washing away salt residue if your region uses it, and clearing pollen that tends to cling to damp surfaces.
This is also a good time to inspect for cracks, lifted pavers, or worn sealer. If you notice sticky residue around doors or traffic paths, a deeper clean may help before outdoor season begins.
Summer maintenance: manage spills, sunscreen stains, dust, and foot traffic
Summer patios get frequent use, which means more spills and more tracked-in dust. Food grease, drink spills, sunscreen transfer, and bare-foot traffic can all leave film on the surface.
Light, regular cleaning works better than waiting until stains build up. Spot-clean as soon as possible, especially after cookouts or rainy days that leave muddy footprints.
Fall prep: clear leaves, sap, and organic debris before moisture sets in
Fall leaves can stain quickly when they sit on a damp patio. Sap, berries, and decomposing plant matter also create slippery patches and may feed mildew growth if left in place.
Clear debris often, especially near corners, drains, and furniture legs. If you’re planning a broader seasonal reset indoors too, a monthly deep cleaning cleaning checklist can help you organize the bigger jobs alongside patio care.
Winter protection: prevent freeze-thaw damage, mold, and standing water
Before winter, focus on drainage and moisture control. Standing water can freeze, expand, and contribute to surface damage, while damp organic residue can encourage mold or algae.
For colder climates, it is smart to finish with a clean, dry surface and store items that trap moisture. If your patio has a sealer, check whether the manufacturer recommends reapplication before winter.
- Sweep or blow off loose debris
- Remove leaves, twigs, and dead plant matter
- Spot-treat stains before they set
- Rinse away pollen, dust, and residue
- Check drainage, cracks, and loose joints
- Protect the surface with the right sealer if needed
Step-by-Step Deep Cleaning Process for Outdoor Patio Floors
A deep clean should be methodical. The goal is to lift grime without forcing water, cleaner, or abrasion into places where it can cause long-term damage. [Source: Family Handyman]
Dry debris removal: sweeping, leaf blowing, and edge detailing
Start dry. Sweep or leaf-blow the patio, then pay attention to edges, corners, furniture bases, and the line where the patio meets walls or planters.
This step matters because loose grit can scratch finishes during scrubbing. It also helps cleaners work directly on stains instead of mixing with surface debris.
Pre-treatment for stains: grease, rust, mildew, tannins, and food spills
Pre-treat stains before washing the whole patio. Grease often needs a degreasing product, rust may need a specialty remover, and mildew usually responds best to a cleaner designed for outdoor organic growth.
Tannin stains from leaves or wood furniture can be stubborn on light-colored stone and concrete. Food spills should be handled quickly because sugary residue can attract more dirt and become sticky in warm weather.
Choosing the right cleaner: pH-neutral, stone-safe, or heavy-duty degreaser
Cleaner choice should follow the surface, not the stain alone. pH-neutral or stone-safe cleaners are often a safer starting point for natural stone, while concrete and heavily soiled pavers may tolerate stronger formulas if the label allows it.
For greasy barbecue zones, a heavy-duty degreaser may help, but only if it is compatible with the surface and any sealer present. When a product label is vague, choose caution over strength.
Scrubbing and rinsing techniques that protect grout, joints, and sealers
Use a stiff but non-abrasive brush for concrete and many pavers, and a softer approach for delicate stone. Work in small sections so the cleaner does not dry too quickly, then rinse thoroughly to remove residue.
Thorough rinsing matters because leftover cleaner can leave streaks, attract dirt, or interfere with sealers. On paver patios, rinse gently enough to avoid removing joint sand.
When pressure washing helps and when it can damage the surface
Pressure washing can be useful for durable concrete and some pavers, especially when grime is widespread. It can also save time on large outdoor areas if the setting and nozzle are appropriate.
But pressure can damage soft stone, strip sand from joints, force water into cracks, or lift sealant. If you are unsure, use the lowest effective setting and keep the wand moving, or skip pressure washing entirely.
Sweep, blow, and remove furniture or planters that block edges and corners.
Apply the correct stain remover to grease, mildew, rust, or leaf marks.
Scrub with a compatible cleaner, then rinse fully before the product dries.
Check for remaining stains, drainage problems, or wear that may need sealing or repair.
Common Patio Cleaning Mistakes That Damage Floors
Many patio problems come from cleaning too aggressively or using the wrong product for the material. A careful approach usually saves time and repair costs later.
Using the wrong cleaner on natural stone or sealed pavers
Stone and sealed pavers can be sensitive to acids, solvents, and harsh alkalines. Even if a product removes stains quickly, it may leave the surface dull or weaken the protective finish.
Overusing pressure washers and stripping joint sand or surface sealant
Too much pressure can be more damaging than the dirt itself. If you notice sand loss, cloudy patches, or a roughened surface after washing, the setting may have been too aggressive.
Ignoring drainage issues that cause recurring dirt and algae
If water keeps pooling in the same area, dirt and algae will keep returning too. Cleaning helps, but recurring buildup often points to a drainage or slope issue that needs attention.
Scrubbing with abrasive tools that scratch finishes
Metal brushes, harsh pads, and gritty compounds can scratch polished stone, decorative coatings, or sealed surfaces. Use the least abrasive tool that still gets the job done.
Skipping spot tests before applying new products
A spot test is one of the simplest ways to avoid a costly mistake. Apply the product in a hidden area, wait for the recommended time, and check for discoloration or dulling before cleaning the full patio.
- Routine concrete patio cleaning
- Safe maintenance on many paver surfaces
- Spot-testing new products before full use
- Acidic cleaners on limestone or travertine
- High-pressure washing near joints or sealers
- Abrasive scrubbing pads on finished surfaces
Cleaning Products, Tools, and Cost Comparison for 2025
Costs vary widely depending on patio size, surface type, and whether you already own basic tools. The best value is usually the option that cleans effectively without causing damage that leads to repair work. [Source: WebMD]
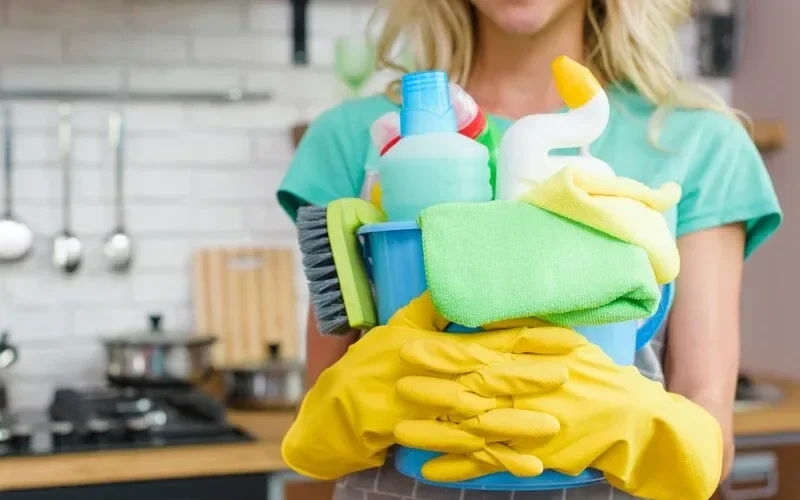
Budget-friendly DIY toolkit: broom, deck brush, bucket, sprayer, and patio-safe cleaner
A basic DIY setup can handle many routine jobs. A broom, bucket, hose, deck brush, and a surface-appropriate cleaner are enough for seasonal maintenance on smaller patios.
Mid-range options: surface cleaner attachments, wet/dry vacs, and stain removers
Mid-range tools can improve efficiency and consistency. Surface cleaner attachments help on large flat areas, while a wet/dry vac can be useful for removing standing water or catching excess runoff in enclosed spaces.
Professional cleaning services: when the cost is worth the result
Professional help can be worth it when the patio is large, the stains are stubborn, or the material is delicate. It can also be a smart choice when you need restoration-level cleaning rather than routine maintenance.
DIY vs. pro comparison for large patios, delicate stone, and heavy staining
DIY is often best for simple upkeep, light staining, and flexible timing. A professional may be the better choice for expensive stone, recurring discoloration, or situations where the wrong method could create permanent surface changes.
| Method / Product | Best For | Be Careful With |
|---|---|---|
| Basic DIY tools | Routine seasonal cleaning and light debris | May be slow on large or heavily stained patios |
| Surface cleaner attachment | Even cleaning on concrete and some pavers | Not ideal for delicate stone or loose joints |
| Specialty stain removers | Grease, rust, mildew, and tannin spots | Always check surface compatibility first |
| Professional service | Large patios, restoration, and sensitive materials | Cost varies and may not include repairs or sealing |
Buying a few patio-safe tools can be economical over time, but repeated product trials may cost more than hiring help for a difficult surface. If you need new pads, specialty cleaners, or a sealer refresh, factor those replacement costs into the decision.
When to Call a Flooring or Patio Cleaning Professional
Some patio issues are bigger than a weekend cleaning project. If the problem involves damage, recurring stains, or surface restrictions, it is safer to ask for expert help.
Deep stains, efflorescence, mold, or recurring discoloration
Persistent stains that return after cleaning may signal a deeper issue. Efflorescence, mold, or repeated discoloration can require more than standard washing, especially if moisture is getting trapped below the surface.
Loose pavers, cracked grout, uneven slabs, or drainage concerns
Cleaning does not fix structural problems. If the patio is shifting, cracking, or holding water, a professional can help determine whether the issue is cosmetic, drainage-related, or a repair concern.
Sealed stone, historic materials, or surfaces with manufacturer restrictions
Some materials have strict care requirements. If the patio is made of sealed stone, older historic material, or a product with warranty instructions, it is worth checking those rules before using anything stronger than a mild cleaner.
Signs the patio needs restoration instead of routine cleaning
If the surface looks faded, rough, pitted, or permanently marked, cleaning alone may not restore it. At that point, restoration, resealing, or targeted repair may be more appropriate than another wash cycle.
When a patio keeps getting dirty in the same spots, the cleaning problem may actually be a drainage, sealing, or settling problem. That is a good time to ask a professional before the damage spreads.
Final Recap: The Seasonal Patio Cleaning Checklist That Keeps Outdoor Floors Looking New
A reliable seasonal patio cleaning cleaning checklist starts with the surface type, then matches the work to the season. Spring removes winter residue, summer handles spills and dust, fall clears organic debris, and winter focuses on moisture control and protection.
Quick summary of the most important seasonal tasks
At minimum, sweep regularly, spot-treat stains early, rinse thoroughly, and inspect for drainage or joint issues. Use the mildest effective cleaner, and save pressure washing for surfaces that can handle it safely.
How routine maintenance protects appearance, safety, and surface lifespan
Routine patio care helps the floor look better, stay less slippery, and last longer. It also reduces the chance that dirt, mildew, or staining will turn into a bigger restoration project later.
Closing takeaway from Emma Whitmore for FloorsMop readers in 2025
The best patio cleaning plan is the one that respects the material and the season. If you stay consistent and clean with care, your outdoor floor can stay attractive and usable without unnecessary wear.
Frequently Asked Questions
Light sweeping and spot cleaning can happen weekly during active seasons. A deeper seasonal clean is usually helpful in spring, fall, and before winter.
No, not all surfaces handle pressure washing well. Concrete and some pavers may tolerate it, but natural stone, sealed surfaces, and loose joints can be damaged.
A pH-neutral or stone-safe cleaner is usually the safest starting point. Always check the label and test a small hidden area first.
Use a cleaner made for outdoor mildew or organic growth, then scrub gently and rinse well. Make sure the area dries fully so the problem does not return as quickly.
It depends on the surface, wear level, and the sealer already in place. If water no longer beads or the finish looks worn, check the product guidance or ask a professional.
Hire a professional for deep stains, delicate stone, structural issues, or recurring discoloration. It is also a smart option if you are unsure about product compatibility or warranty requirements.